
A room divider for a small apartment works when it gives each zone a clear edge without taking the floor those zones need to function. The practical guide to zoning without walls is the broader overview of dividing space with furniture, fabric and screens. This guide works on one decision: choosing and placing a divider in a compact apartment. New rentals leave little slack: the median U.S. multifamily unit completed for rent in 2025 was 1,000 square feet1. Measure the walkway first. Then decide how much light, privacy and storage the divider must carry, and how quickly it resets.
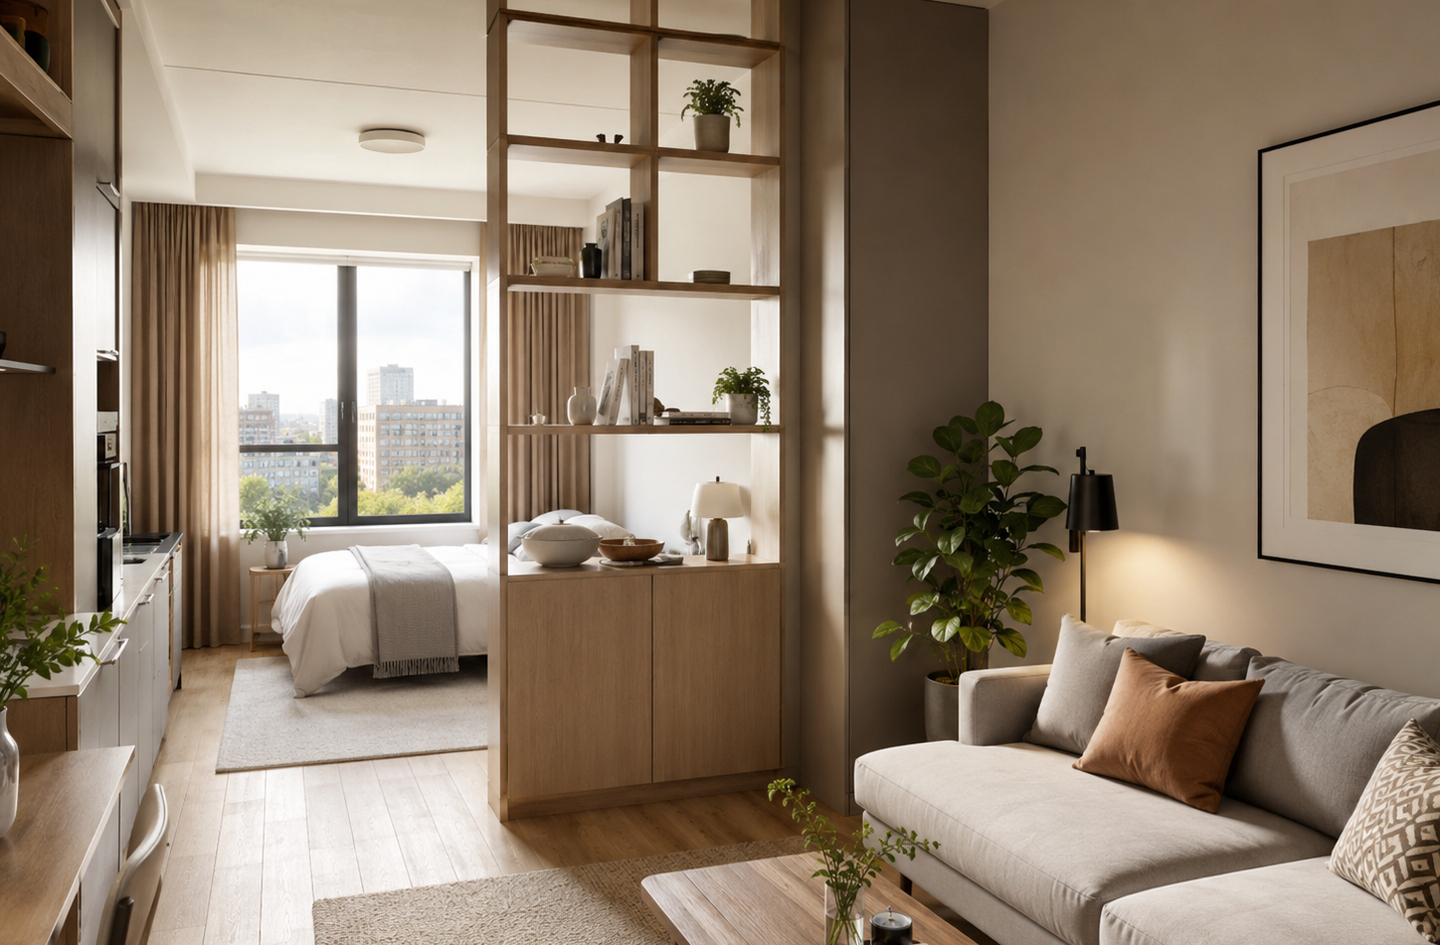
Quick Answer
How do you choose a room divider for a small apartment?
Start with the walkway, not the divider. Keep at least a 36-inch clear path past the divider, the ADA minimum width for an accessible walking route2. Then let the floor that remains decide the divider’s depth. Choose its height and openness by how much daylight and privacy each zone needs. Add storage only when the zone it faces can reach it, and confirm the whole setup resets in about a minute.
- Map the zones and the path between them.
- Set the divider’s footprint budget.
- Decide how much daylight it must pass.
- Pick the privacy height.
- Decide whether it should hold storage.
- Match the divider type to your lease.
- Test the daily reset.
Key Takeaways
- A 36-inch walking surface is the ADA accessible-route minimum2, so a divider that leaves less than that at its open end narrows the main path below that accessibility minimum.
- A window lights a room to a depth of about 1.5 times its head height, according to BRANZ guidance3. Put the zone that needs daylight inside that depth, and the divider at or just past its edge.
- Cornell notes on office screens treat a 4-foot screen as no help for seated speech privacy, and set 5 feet with solid mass as the least useful height4. A waist-high divider marks a zone; it neither hides it nor quiets it.
- A divider is a layout decision before it is a decor decision. Square footage is fixed. Flow is a choice.
Before You Begin: What a Small Apartment Divider Has to Leave Clear
A small apartment divider has to leave three things clear. They are the path from the door to each zone, the window’s daylight, and the space needed to use the furniture on both sides. Compact plans put that pressure on one main room. Of the U.S. multifamily units completed in 2025, built for rent or for sale, 42% had one bedroom1. In those plans one living room carries the sofa, the desk and the dining table, and a studio adds the bed.
A room divider is a freestanding or lightly fixed element, such as a curtain, screen, shelf or panel, that marks the edge between two zones without being a wall. That definition matters for renters. A divider has to leave with you when the lease ends, which rules out anything framed, wired or plastered into place.
Gather the following before you shop:
- A tape measure, a roll of painter’s tape and a pencil.
- A rough sketch of the main room showing the entry door, every window, the closet and the edge of the kitchen.
- The width, depth and height of each divider you are considering, and how it stands: on its own feet, pressed against the ceiling, or hung from a track.
- Your lease, or a written answer from the landlord, on drilling into ceilings and walls.
- Time: about an hour to measure, tape out the plan and walk through it.
Step 1: Map the Zones and the Path Between Them
By the end of this step you will know where the divider can stand without crossing the main path. A circulation path is the strip of floor people use to move from the entry to each zone and to the window, closet and bathroom. The U.S. Access Board sets 36 inches as the minimum clear width of an accessible walking surface2. That is the ADA accessible-route minimum for covered facilities, not a comfort target, but it is a sensible floor for the main path in a home.
Residential planning research lands in the same range. A 1945 University of Illinois Small Homes Council circular states that moving furniture requires a hall width of 36 to 40 inches5. The Building Research Council’s 1992 bedroom standards plan a 40-inch-wide access space along one side and the foot of the bed6. In a studio, the strip beside the bed is part of the path, so the divider cannot stand in it.
- Draw the path before you draw the divider. Trace one line from the entry door to the kitchen, the bathroom, the bed and the window.
- Label each zone by its routine: sleep, work, eat or relax.
- Place the divider on a zone edge that the path crosses only once, at the divider’s open end.
- Tape a 36-inch opening at that end and walk through it carrying a full laundry basket.
The step is complete when the taped path reaches every zone without passing through another zone’s furniture.
A divider placed across the main path turns one room into two dead ends; placed alongside the path, it creates two zones and keeps a single route.
Step 2: Set the Divider’s Footprint Budget
By the end of this step you will have a maximum depth and length for the divider. A footprint budget is the floor area a divider may occupy once every path and every use clearance is protected. Depth is the number small apartments run out of first. A 1953 University of Illinois Small Homes Council planning circular rates a 12-inch shelf depth ample even for unusually large books7. A bookcase divider deeper than that adds floor cost faster than it adds useful shelf space.
Length follows from the path. Subtract the opening you taped in Step 1 from the width of the room, and the result is the longest divider that line can take. A curtain on a ceiling track takes almost no floor depth, which is why it suits rooms with no spare floor at all. A folding screen needs extra depth for its zigzag, and a storage unit needs clear floor in front of each face that people reach into.
Worked Example: Fitting a Divider Into a One-Window Studio
Worked example, calculated from cited inputs. Take a studio 12 feet wide and 20 feet long, or 144 by 240 inches, with one window on a short wall whose top sits 7 feet above the floor. The bed goes at the far end, away from the window, and the entry door and kitchen sit on the window half.
- Daylight depth: 1.5 x 7 feet = 10.5 feet of useful daylight from the window wall3.
- Bed zone: a full bed 80 inches long6, plus the 40-inch access space at its foot6, plus a 12-inch bookcase7, gives 80 + 40 + 12 = 132 inches, or 11 feet.
- Living and work zone: 240 – 132 = 108 inches, or 9 feet, all of it inside the daylit depth.
- Divider length: 144 – 36 = 108 inches, which keeps the 36-inch opening at one end2.
Result: a 12-inch bookcase about 9 feet long, set 9 feet from the window wall, keeps the desk and sofa in daylight and the bed out of the walkway. The bed zone sits past the daylit depth, so a solid, full-height divider would leave it dim, while an open-backed or partial-height unit lets light carry over or through.
The step is complete when you can write down two numbers: the deepest divider the room allows and the longest one it allows.
In a compact room, every inch of divider depth comes out of a zone, so choose the shallowest divider that does the job you have named for it.
Step 3: Decide How Much Daylight the Divider Must Pass
By the end of this step you will know whether the divider can be solid or must let light through. BRANZ, New Zealand’s building research body, states that a window produces useful light to a depth of about 1.5 times the window head height3. Window head height is the distance from the floor to the top of the window opening. Beyond that depth, the far zone already depends on light crossing the room, and a solid divider cuts it off.
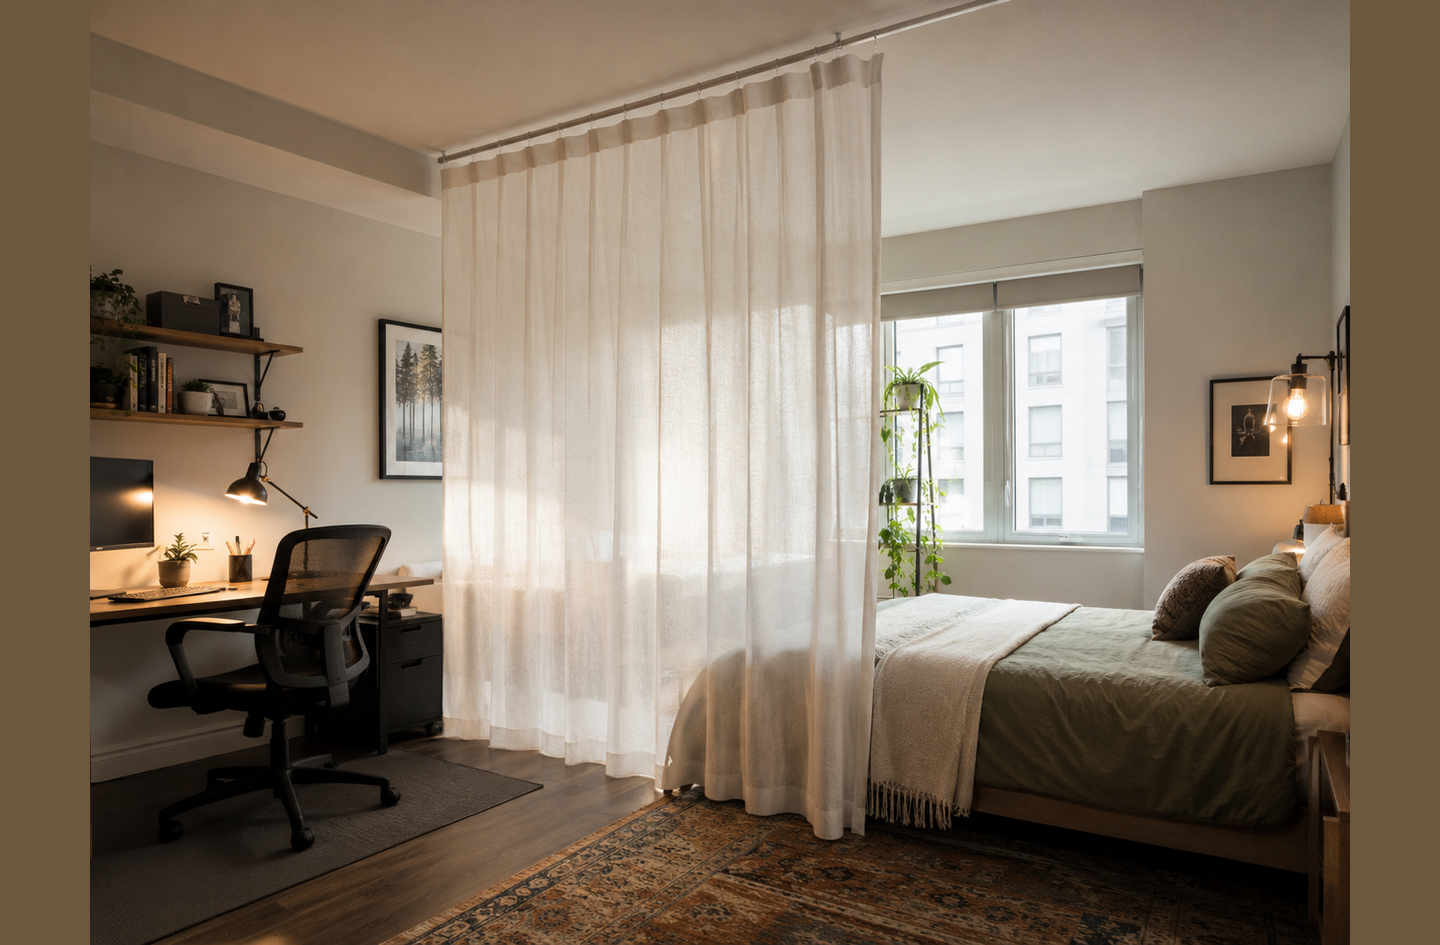
BRANZ also advises keeping the distance from the window to the back wall within 1.5 to 2 times the head height if daylight is to reach that wall3. The same guidance names borrowed lights, openings that pass daylight from one space into the next, as one way to improve light that falls off with distance3. A sheer curtain, open shelving or a slatted screen plays a role similar to a borrowed light for the far zone.
- Divider parallel to the only window wall: the far zone gets its daylight across the divider line, so a solid divider darkens it at any depth. Choose a sheer curtain, an open-backed shelf, slats, or a divider that stops well short of the ceiling. This matters most when the far zone sits past the daylit depth.
- Each zone has its own window, or the divider runs perpendicular to the window wall: a solid panel or closed-back unit is workable, because both zones face the glass.
- Window inside the bed zone: keep the divider short of full height or open at one end, so the living side still gets light.
Vertical slats are one way to keep light moving, and the guide to wood slat room dividers compares slat spacing against privacy. The window also matters as a way out. The Building Research Council’s bedroom standards state that, in an emergency, a bedroom should have at least one operable window large enough for the occupant to escape6. A full-height divider that cuts the bed zone off from both the only window and the door works against that intent. Keep an opening the sleeper can reach in the dark.
Decide daylight before style: a divider that darkens the zone where you work costs more every day than it returns in privacy.
Step 4: Pick the Privacy Height
By the end of this step you will have a target height range for the divider. Privacy comes in two kinds, being seen and being heard. Cornell University ergonomics course notes on office screens address the second, and describe a 4-foot screen as effectively zero height for speech privacy. It sits at the height of a seated person’s mouth and ears4. The same notes set at least 5 feet, with solid mass, as the least height with any acoustic impact4. For being seen, Small Space Logic uses that seated height as a working reference: a divider has to rise clearly above it to hide a seated person. That visual target is an inference from the Cornell figure4, not a tested threshold.
Storage and the ceiling frame the top of the range. The 1953 Illinois storage circular recommends a top shelf for items in frequent use no higher than 72 inches above the floor7. The Building Research Council noted in 1992 that an 8-foot ceiling is common in most parts of the country6. Between 60 inches and the ceiling lies the band where a divider starts to hide a zone, and above 72 inches its shelves move out of easy daily reach.
- Below about 48 inches, the seated ear height in the Cornell notes4: a sofa back, a low console or a waist-high shelf marks a zone edge without hiding anything.
- From 60 to 72 inches: a tall shelf or screen hides a seated person and a made bed, by Small Space Logic’s reading, with its top shelf in daily reach47.
- Full height: the most visual privacy and the most light loss. The guide to floor to ceiling room dividers compares tension, track and panel options.
What a Divider Does for Sound
Sound Transmission Class (STC) is a single-number rating of how well a partition blocks airborne sound, and a higher number means better blocking. Gaps undo most of it. National Research Council Canada, writing about office partitions, found that a leak of 0.1 percent of a partition’s area caps its effective rating at about STC 308. That cap holds whether the partition itself is rated STC 40 or STC 608. A freestanding divider has open gaps at the floor, the ceiling and its open end, so it works as a visual boundary first. The article on whether a soundproof room divider reduces noise covers what acoustic panels can and cannot do.
Pick the height from the zone you sit in. A divider that hides the bed from someone seated on the sofa does its job, even if a standing visitor can see over it.
Step 5: Decide Whether the Divider Should Hold Storage
By the end of this step you will know whether the divider should be a storage piece or a plain boundary. A storage divider earns its footprint only when people can reach it from the side that uses it. A 1953 University of Illinois circular already treated storage units as room partitions:
“The basic storage units can be combined in many ways to form partitions between rooms.”
University of Illinois Small Homes Council7
The same circular notes that units placed back to back can serve adjacent rooms7. In a studio, that means books and baskets facing the living side and a clothes or linen face toward the bed. Open shelving passes light, while a closed back blocks it, so the choice also settles Step 3.
- List what the divider would hold and which zone uses each item.
- Keep clear floor in front of every face someone reaches into, not only on the walkway side.
- Put heavy items on the lowest shelves and lighter, daily items between waist and eye height.
- Stabilise any tall shelf against tipping. Mid-room there is no wall behind it. Anchor one end to a perpendicular wall with the landlord’s approval, choose a floor-to-ceiling tension-mounted shelving system, or pick a low, wide unit. Follow the maker’s instructions.
Open shelving used as a divider trades storage density against light. The guide to the bookshelf room divider covers two-sided access, finished backs and stabilisation.
Cabinets, wardrobes and console-style pieces follow the same rule. The guide to room divider storage explains when a partition should hold everyday items and when it should stay empty.
If nothing on the divider is used from the zone it faces, it is a bookcase in the wrong place, not a divider.
Step 6: Match the Divider Type to Your Lease
By the end of this step you will have a divider type that fits both the room and the rental agreement. Installation sets the renter risk. A tension-mounted divider is a pole or panel held between floor and ceiling by spring or screw pressure, with no holes drilled. Freestanding screens and low units need no fixings, tall shelving needs anchoring, and a ceiling track needs screws into the ceiling and the landlord’s approval. Anything framed, wired or built in is construction, and belongs with a licensed contractor and the building’s permission.
| Divider type | Floor depth | Daylight | Visual privacy | Storage | Renter fit | Daily reset |
|---|---|---|---|---|---|---|
| Sheer curtain on a ceiling track | Almost none | Passes most light | Blurs shapes only | None | Track needs ceiling screws | Draw it open or shut |
| Heavier curtain on a tension rod | Almost none | Blocks light when closed | Hides the zone when closed | None | No drilling, within the rod’s rated span and load | Draw it open or shut |
| Folding screen | Needs room for its zigzag | Depends on the panel | Up to its own height | None | Freestanding | Fold and store it |
| Open bookcase | About 12 in for books7 | Passes light between items | Partial, set by how full it is | Two-sided shelves | Needs anchoring if tall | Fixed in place |
| Slatted panel | Shallow | Passes light at an angle | Set by slat spacing | None, or a few shelves | Freestanding or tension-mounted | Fixed in place |
| Wardrobe or cabinet | The deepest option | Blocks light | Full, up to its height | Closed storage | Needs anchoring | Fixed in place |
Read the table from the left. If Step 2 left almost no depth, only the curtain rows remain. If Step 3 showed the far zone sits past the daylit depth, drop the rows that block light. Ask the building manager before fixing any track or pole near a sprinkler head, a smoke alarm or a ceiling light. Anything that touches wiring or framing belongs with a licensed contractor.
For most renters, the best divider is the one the lease already allows, because a piece you cannot install leaves the room exactly as it was.
Step 7: Test the Daily Reset
By the end of this step you will know whether the divider still works on an ordinary weekday, not only on moving day. A divider that has to be moved, folded or cleared every evening adds a chore to the routine, and effortful chores tend to get skipped. Tape the divider’s outline on the floor before buying, and live with the tape for a few days.
- Walk the full path from the entry to the bed with the lights off.
- Open every door, drawer and cabinet that faces the divider.
- Time how long it takes to draw the curtain, fold the screen or clear the shelf top.
- Sit in each zone and check what you can see of the other.
The step is complete when the path stays clear, every door opens fully and the reset takes about a minute or less.
A divider that resets in seconds is far more likely to be used daily. One that takes ten minutes tends to stay in one position and turns into a wall you did not plan.
Common Mistakes to Avoid
The most common mistake is choosing the divider before measuring the path it has to leave open. Each of the following starts as a style decision and ends as a layout problem.
Buying a divider from an inspiration photo. The photo’s room is rarely the same width as yours. Measure the width first and let it set the depth.
Running the divider wall to wall. A divider with no opening at either end forces the path through a zone. Keep the open end on the path side.
Putting the work zone in the dark half. A desk past the daylit depth leans on lamps for much of the day. Put the zone that needs daylight closest to the window, and the bed behind the divider.
Expecting a divider to stop sound. A freestanding piece with gaps is a visual boundary. If noise is the problem, treat it as a separate project.
What Success Looks Like
Success is a room where each zone has a clear edge and the main path never passes through another zone’s furniture. You should be able to walk from the door to the bed without turning sideways. From the sofa, the unmade bed stays out of sight, and the desk gets daylight for most of the day. If it is freestanding or tension-mounted, the divider should also come out of the apartment in one afternoon with no patching left for the landlord. Once the zones work, finish them with rugs, lighting and color.
Frequently Asked Questions
How tall should a room divider be?
For speech privacy, at least 5 feet with solid mass, according to Cornell ergonomics notes on office screens4. To hide a seated person from view, the divider has to rise clearly above seated head height. To mark a zone, waist height is enough. Above about 72 inches, shelves on a storage divider fall out of easy daily reach7.
Do room dividers make a small apartment look smaller?
A solid, full-height divider can, because it cuts the room’s sightline and its daylight. A window lights a room to a depth of about 1.5 times its head height3, so a far zone behind a solid panel turns dim. Sheer fabric, open shelving and partial-height screens keep the room reading as one space.
Can you put a room divider in a rental apartment?
Yes, as long as it is freestanding or held by pressure. Folding screens, low shelves and tension-rod curtains need no drilling and leave with you. A tall bookcase needs anchoring and a ceiling track needs screws, so get the landlord’s approval in writing first. Anything framed, wired or built in is construction and needs the building’s permission.
How much space should you leave around a room divider?
Leave a clear opening at least 36 inches wide at one end, the ADA minimum for an accessible walking route2. Beside a bed, Illinois bedroom standards plan a 40-inch access space6. A storage divider also needs clear floor in front of each face that someone reaches into.
How do you divide a studio apartment without walls?
Map the path from the door to each zone, then place a freestanding divider along a zone edge with one open end. Put the zone that needs daylight nearest the window and the bed behind the divider. Choose a curtain when floor is tight, a bookcase when storage is short, and a screen when the setup has to fold away.
Limitations and Edge Cases
- The clearance figures come from planning and accessibility documents: Illinois housing circulars from 1945 to 1992 and the 2010 ADA standards. They set useful floors for a home layout, not personal comfort targets, and they do not cover wheelchair turning space.
- The privacy and sound figures come from office settings, Cornell’s screen guidance and National Research Council Canada’s partition research. They describe the physics of screens and gaps, not tested results for any home divider.
- The daylight rule is BRANZ guidance for side windows. Tinted glass, a balcony overhang or a building close outside shortens the daylit depth, so check the room at midday before relying on it.
Some divider plans go beyond furniture: a closed sleeping room, work near a sprinkler head, smoke alarm or wiring, or fixings into the ceiling structure. For any of these, talk to the landlord or building manager and a licensed contractor before installing. Local building and fire codes decide what counts as a bedroom.
References
Methodology: Small Space Logic compiled the clearance, depth, height and daylight figures from the government, university and research sources listed here, read in October 2026, and calculated the worked example from them; no divider was tested, and Oded Feigin holds editorial responsibility for the article.
- U.S. Census Bureau – Highlights of 2025 Characteristics of New Housing.
- U.S. Access Board – Guide to the ADA Standards, Chapter 4: Accessible Routes, section 403.5.1 Clear Width, 2010 ADA Standards for Accessible Design.
- BRANZ – Level, Passive Design: Daylighting, updated October 20, 2023.
- Cornell University – DEA 3500 course notes, Ambient Environment: Acoustics and Speech Privacy, Acoustics lecture 5 (undated).
- University of Illinois Small Homes Council – Designing the Home: How to Select a Plan, Circular C2.1, 1945.
- University of Illinois Building Research Council – Bedroom Planning Standards, Council Notes Vol. 12, No. 4, 1992.
- University of Illinois Small Homes Council – Household Storage Units, Circular C5.1, 1953.
- National Research Council Canada – Canadian Building Digest CBD-186, Office Partitions: Acoustical Requirements for Design and Construction, A.C.C. Warnock, May 1977 (archived copy hosted by MIT).
Conclusion
A room divider for a small apartment succeeds or fails on the floor it leaves, not the style it adds. Protect the path, size the divider to the depth that remains, and let daylight, privacy height, storage and the lease narrow the type. Engineer the layout first, decorate second.
See the broader overview in the room dividers guide for how this decision fits into zoning a home without walls.