
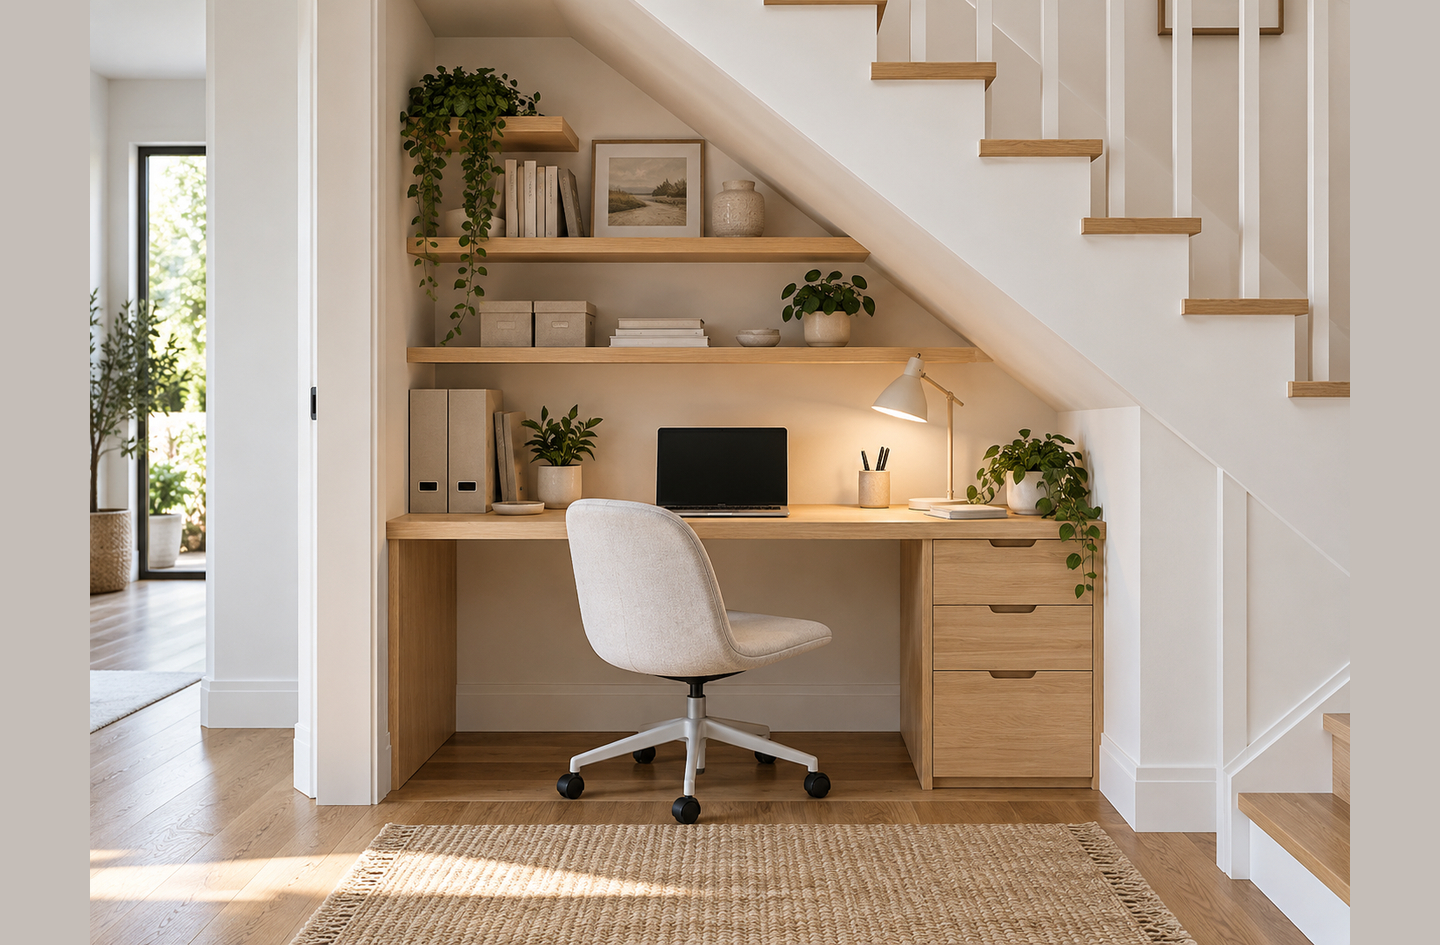
The under-stair void holds more usable floor area than most people expect, but the sloped ceiling turns standard under stairs office ideas into guesswork. In the first quarter of 2024, nearly 23% of employed Americans teleworked at least part of their week.7 The small home office planning overview on this site covers the full compact-workspace system. This guide focuses on the one variable that sets under-stair setups apart: the ceiling profile that slopes lower as you move toward the stairs. Mapping that profile before ordering or building anything is how the zone actually works.
Quick Answer
How does the ceiling slope shape under stairs office ideas?
The ceiling slope divides the void into three zones: a standing-clearance zone at the outer edge, a seated-desk zone in the middle, and a low-storage zone near the stairs. The 2021 IRC sets a maximum riser height of 7-3/4 inches and a minimum tread depth of 10 inches.3 That means the ceiling gains roughly 7-3/4 inches of height for every 10 horizontal inches away from the stair base. That geometry determines the desk position before any furniture is chosen.
Key Takeaways
- The ceiling slope, not the floor area, is the first constraint to map: measure headroom at 6-inch intervals before selecting any furniture.
- OSHA guidelines require a monitor at least 20 inches from the eyes,2 which sets the minimum usable desk depth regardless of ceiling height.
- Task lighting in an enclosed alcove must reach 30 to 50 foot-candles at the desk surface;5 most under-stair spaces have no natural light, making fixture placement essential.
- Standard desk height (28 to 30 inches) clears the ceiling at roughly 4 to 5 feet horizontally from the stair base, depending on the rise-to-run ratio.
- Power and cable routing must be planned before any wall finish or casing goes in.
Under Stairs Office Ideas: What to Measure First
Before choosing a desk, a chair, or any storage unit, complete a full measurement pass of the under-stair void. The two constraints that cannot be changed after furniture arrives are the headroom profile and the power access points. Everything else is adjustable.
Tools:
- Tape measure, 25-foot minimum
- Flashlight or phone torch
- Notepad or phone for recording measurements at each position
- Painter’s tape for marking floor positions
Pre-measurement checks:
- Clear the space completely before starting.
- Locate the nearest electrical outlet and identify whether any circuits run through the under-stair framing. Consult a licensed electrician before opening any framing or wall.
- Note whether the outer wall is an exterior wall. Exterior walls may have insulation or vapor barriers that affect where outlets can be placed.
Estimated time: plan for a full measurement pass of the void before making any furniture decisions.
Step 1: Map the Headroom Profile Along the Full Stair Run
Headroom is the vertical clearance from the floor to the lowest fixed obstruction directly above, including the underside of stair framing. Mapping it at regular intervals gives you the actual usable geometry before any furniture decision is made.
The 2021 International Residential Code requires a minimum stair headroom of 6 feet 8 inches (80 inches), measured from the sloped plane of the stair nosings upward.3 That clearance protects the person climbing the stairs, not the person working below. Under the same code, a standard residential stair may have a maximum riser height of 7-3/4 inches and a minimum tread depth of 10 inches.3 For every 10 horizontal inches you move away from the stair stringer, the ceiling in that zone rises by roughly 7-3/4 inches. That is the planning formula for the entire project.
Most planners check the floor area and skip the headroom profile entirely, then order furniture that physically cannot be used in the zone where the ceiling drops below 30 inches near the back of the nook.
How to Take the Measurements
Start at the outer wall, farthest from the stairs, and measure the ceiling height straight up from the floor. Move toward the stairs in 6-inch increments, recording each measurement. Stop when the ceiling drops below 12 inches or when you reach the stair stringer framing. Write down every number; you will use this profile in every step that follows.
Mark the floor positions with painter’s tape as you go so you can return to the exact same spots when the desk is being positioned later.
Reading the Profile: Three Planning Zones
Once you have the headroom series, sort the positions into three zones. These are not design categories; they are physical constraints.
| Distance from stair base (in.) | Approx. ceiling height (in.) | Usability for workspace |
|---|---|---|
| 12 | ~9 | Flat drawer or cable tray only |
| 24 | ~19 | Low storage under 20-inch clearance |
| 36 | ~28 | Desk surface level (minimum) |
| 48 | ~37 | Low seated work (kneeling or children) |
| 60 | ~47 | Seated adult at marginal clearance |
| 72 | ~56 | Comfortable seated work zone |
| 84 | ~65 | Partial standing clearance |
| 96 | ~74 | Near-full standing clearance (most adults) |
These values assume an IRC-maximum riser of 7-3/4 inches and an IRC-minimum tread depth of 10 inches,3 starting from ground level at the stair base. Older stairs or stairs built to a different rise-run ratio will produce different numbers. Use your measured profile; use this table only to calibrate which zone each position falls in.
Step 2: Set Desk Depth Based on the Ceiling Slope
Tread depth is the horizontal distance from the front nosing of one stair step to the front nosing of the step directly above it.3 The 2021 IRC sets the minimum at 10 inches per step. Each tread represents 10 horizontal inches of floor space with a corresponding riser’s worth of ceiling height change above the zone beneath it. That geometry determines how much desk surface can sit within the comfortable-seated zone.
OSHA’s computer workstation guidelines require a work surface deep enough to position a monitor at least 20 inches from the eyes.2 A standard monitor with a stand occupies 12 to 15 inches from the wall to the screen face. A keyboard in front adds 6 to 8 more inches. The combined depth from the back wall to the keyboard front runs 18 to 23 inches at the absolute minimum, with no room for paperwork, a second device, or arm rest space.
“Viewing distances that are too short may cause your eyes to work harder to focus (convergence problems) and may require you to sit in awkward postures, such as tilting your head backward or pushing your chair away from the screen.”
OSHA Computer Workstations eTool, U.S. Department of Labor1
In an under-stair alcove, the instinct is to push the desk as deep into the space as possible. But the back edge of the desk must stay in a zone where the ceiling is at least 30 inches high. Otherwise there is nowhere to position a monitor upright and no way to place a keyboard at a working distance from the screen. Locate the point in your headroom profile where the ceiling first reaches 30 inches. Place the desk’s back edge there. Let the surface extend toward the outer wall, where the ceiling is higher.
OSHA also notes that limited desk surface space causes users to place components in positions that force awkward postures.2 In a sloped ceiling space, that typically means the monitor ends up too close to the face. The keyboard can sit on an uneven or over-elevated surface, or the chair is pushed back into a zone with no overhead clearance.
A desk positioned for the floor footprint alone, without checking the headroom profile at the monitor position, is the single most common reason an under-stair office setup gets abandoned within a month.
For a full comparison of compact desk depths, surface widths, and legroom configurations, see the guide on choosing a desk for small spaces.
Step 3: Plan Task Lighting for an Enclosed Space
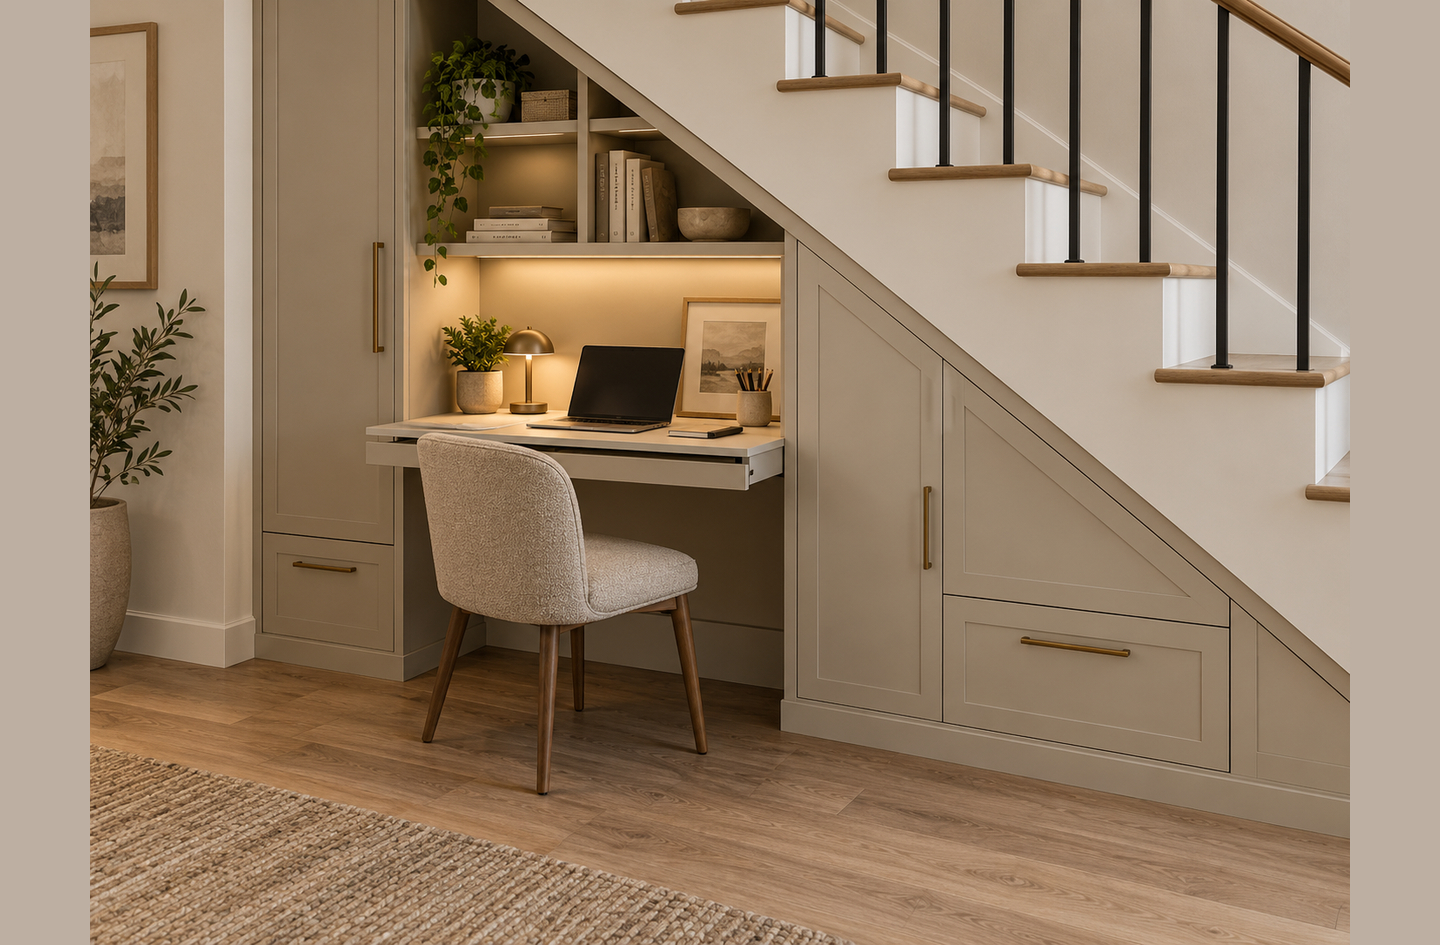
Task lighting is directional artificial light aimed specifically at the work surface, distinct from ambient overhead lighting, and measured in foot-candles at the desk surface. In an enclosed under-stair alcove with no window access, task lighting is not supplemental; it is often the only light source for the active work area.
ANSI/IES guidelines recommend 30 to 50 foot-candles on desk surfaces for office work.5 The WELL Building Standard v6 specifies that when ambient light falls below 300 lux (approximately 28 foot-candles), task lighting providing 300 to 500 lux must be available at the work surface on request.6 An enclosed under-stair alcove with overhead room light positioned behind the seated worker almost always falls below the 300-lux ambient threshold when the alcove is in use.
Three configurations that reliably reach the 30 to 50 foot-candle target in a sloped nook:
- Under-shelf LED strip (renter-safe): clips or adhesive-mounts to the underside of a shelf positioned above the monitor, casts light directly down onto the keyboard and desk surface. No ceiling or wall modification needed. Power runs from a USB port or a standard wall plug.
- Adjustable arm lamp on the desk surface: positions a directional cone of light exactly at the task area. An arm lamp with a flexible head is preferred over a fixed desk lamp in low-ceiling spaces because the arm can be angled to clear the slope without raising the fixture height.
- Recessed LED puck (ceiling-mounted): an option only when the stair framing above the desk zone has sufficient depth for a shallow recessed puck. Confirm the required framing depth and any structural impact with a licensed electrician before cutting into any framing.
For rental or non-permanent setups, the under-shelf LED strip is the most direct path to the 30 foot-candle minimum: it requires no wall or ceiling work, draws from a standard outlet, and removes without damage.
Step 4: Route Power and Manage Cables Before Finishing Any Wall
One of the most costly under-stair office planning failures is finalizing furniture placement and then discovering there is no outlet within reach. Under-stair storage spaces are often classified outside the NEC habitable-room requirement for receptacle spacing, which is why they frequently have no outlets at all. A licensed electrician will need to confirm whether the space currently meets code and what is involved in adding a circuit for desk use.
If adding a dedicated outlet is not feasible, a renter-safe path is a power strip with a long cord routed along the baseboard from the nearest accessible outlet. Keep the cord path against the wall and out of the access route. Never route the cord under a door or across an open walking path.
Power Planning Checklist
Before finalizing the desk position, work through these five items:
- Count the circuits needed at the desk: monitor, computer, desk lamp, and any phone or device charger. Four circuits is a practical minimum.
- A USB power hub at the desk reduces wall plugs; confirm the hub’s wattage rating covers the devices you plan to run.
- Route the main power cable along the back wall at baseboard level, not across the desk surface or through the center of the floor.
- Clip cables to the underside of the desk with adhesive cable clips. These leave no permanent marks and remove cleanly when the lease ends.
- Zone 3 near the stair stringer is the natural position for a power strip or cable junction box. No desk or chair can occupy that zone anyway, so it serves only as a routing and equipment shelf.
What to Decide Before Any Drywall or Casing Is Installed
If the under-stair space is being finished from scratch, power placement is the one decision that cannot be undone cheaply. Mark the outlet position on the stud layout before any drywall goes up, confirm it with your electrician, and verify the location against the desk position you identified in Step 2. A single outlet placed 18 inches to the left or right of the desk center can make cable management significantly cleaner or significantly worse.
Step 5: Assign Storage Within the Sloped Zone
The three zones identified in Step 1 each support a different storage type. The planning rule is to match item frequency to zone accessibility: daily items in the outer zone, weekly items in the middle zone, and infrequent items in the inner zone near the stairs.
Zone 1 (Outer Wall, Standing or Near-Standing Clearance)
This zone is where standing access is possible. Use it for active daily items: monitor at the correct height, open shelves at or just above eye level for frequently referenced materials, and the desk lamp or lighting fixture. If there is room above the monitor, one shelf for items accessed at least once per day. Keep this zone uncluttered because it is also the visual focal point of the workspace.
Zone 2 (Middle Section, Seated Headroom)
This is the desk zone. Storage here should be open and reachable from a seated position without standing. A single open shelf or a shallow wall-mounted organizer within arm’s reach is more useful than a cabinet that requires standing to open. Keep the desktop clear of anything not in active use; a crowded desk surface in a confined space signals that the system has broken down.
Zone 3 (Near Stairs, Low Clearance)
The zone closest to the stair stringer typically has 9 to 28 inches of ceiling clearance, based on IRC standard stair geometry.3 That is enough for flat storage up to 12 inches in height: rolling drawer pedestals, flat-file units, or fixed cabinetry for items accessed weekly or less often. A rolling pedestal that pulls out into Zone 2 bridges the access gap effectively, bringing weekly-access items forward without permanently occupying the desk zone.
For fold-down or wall-mounted desk options that free up floor space within Zone 2 when not in use, see the overview of folding desks for small spaces.
Step 6: Plan Chair Clearance and Daily Reset
Riser height is the vertical dimension of a single stair step from one tread surface to the next, capped by the 2021 IRC at a maximum of 7-3/4 inches for residential stairs.3 That measurement shapes the slope of the ceiling above the chair. Checking the seated head clearance at the exact chair position is the last measurement before confirming the desk layout.
OSHA guidelines specify under-desk leg clearance of 20 to 28 inches high.2 A standard task chair seat sits 17 to 21 inches from the floor. The clearance needed from the floor to the underside of the desk is at least the chair seat height plus the seated thigh height, typically 8 to 10 inches. That sum, 25 to 31 inches, sets the minimum under-desk clearance requirement and determines which chairs can physically fit.
In a sloped ceiling space, the chair type matters as much as the chair height. An armless task stool or a task chair with removable or low-profile armrests is far easier to slide in and out of a tight alcove than a fully upholstered ergonomic chair with fixed wide arms. For ergonomic setup guidance within compact desk dimensions, see the article on ergonomic home office setup for small spaces.
The Daily Reset Test
Before finalizing any furniture purchase, run a mock reset test. Use a folding chair and a cardboard box as a stand-in desk at the planned height. Can you push the chair fully under, stand up, and step out of the space in one fluid motion? If the sequence requires more than one or two awkward adjustments, the layout needs revision before a permanent desk is ordered.
A workspace that resets quickly gets used daily. Pew Research found that 75% of remote-capable employed adults work from home at least some of the time.8 A workspace that requires three moves to vacate accumulates clutter and stops functioning as an office within a week. Build the reset into the layout before anything is installed, not as an afterthought.
Common Mistakes to Avoid
These five mistakes account for most of the under-stair offices that fail in the first month. Each one is avoidable with the measurement pass and the reset test from the steps above.
Measuring Only the Floor Area, Not the Headroom Profile
The floor footprint is easy to measure with a single tape pull. The headroom profile requires measuring at multiple horizontal positions. Skipping it leads to a desk positioned where a standard monitor cannot be placed upright, or where standing to reach a high shelf causes the user to bend under the slope every time.
Ignoring the Monitor Distance Requirement When Setting Desk Depth
Pushing the desk as close to the stair stringer as possible wastes the desk depth. OSHA requires a monitor at least 20 inches from the eyes.1 If the desk is shallow or pushed into a low-ceiling zone, the monitor cannot be positioned at the correct distance without extending beyond the back edge. The headroom profile from Step 1 and the 20-inch distance rule from Step 2 together set the desk position; neither alone is sufficient.
Confusing Stair Headroom with Seated-Work Clearance
The IRC minimum stair headroom of 6 feet 8 inches (80 inches) protects someone walking upstairs.3 OSHA requires exit routes to have a ceiling clearance of at least 7 feet 6 inches.4 The seated workspace below will see roughly 50 to 65 inches of clearance at the desk zone. Neither code figure applies directly to a seated workspace. Planning for 50 to 65 inches at the seated zone is correct; assuming the IRC stair headroom or exit-route figure applies to the desk position is not.
Running Cables Across the Access Path
An under-stair office accessed through a doorway or an open archway will have a defined path from the room to the chair. Cables crossing that path are a trip hazard and are the first reason the space stops being used daily. Route all cable runs along the back wall at baseboard level before any desk or furniture is placed.
Ordering Built-In or Custom Furniture Before the Measurement Pass Is Complete
Custom desks and built-in cabinetry are typically non-returnable. Ordering before confirming desk depth, headroom at the monitor position, chair clearance, and the reset path creates expensive mismatches. The measurement pass from Step 1 and the simulated reset test from Step 6 must both be complete before any custom order is placed.
What a Finished Setup Needs to Pass
A functional under-stair office meets these six conditions at the desk position. Treat this as a pre-order checklist: if any condition is not met, return to the step that addresses it before placing an order for furniture or built-in work.
- Ceiling height at the seated head position: minimum 50 inches, ideally 55 inches or more.
- Desk depth, back edge to keyboard front: minimum 24 inches, with the back edge positioned where the ceiling is at least 30 inches.
- Monitor distance from eyes: at least 20 inches, confirmed before the desk is positioned.1
- Task lighting at the desk surface: 30 to 50 foot-candles from a dedicated fixture, not from room ambient light alone.5
- Power access: at least one outlet within reach of the desk, with a cable path that does not cross the access route.
- Reset test: chair fully clears the desk in one move and the space can be exited cleanly.
Frequently Asked Questions
How much floor space does an under-stair office actually need?
A functional under-stair desk zone needs at least 6 feet of horizontal run from the outer wall. On a standard IRC stair, the ceiling reaches 47 to 56 inches of clearance at 5 to 7 feet from the stair stringer,3 which is the seated-work zone. The low-storage zone near the stairs occupies the inner 2 to 3 feet. A total void depth of 8 feet or more is comfortable; 6 feet is the minimum for a desk with proper monitor distance.
Can I set up an under-stair office in a rental without drilling?
Yes. An under-shelf LED strip powered by a standard outlet covers lighting with no wall work. A freestanding desk unit requires no wall attachment. Power runs from the nearest outlet via a baseboard-routed cord. Adhesive cable clips manage the cable path without permanent marks. Tension-mount shelving adds storage in many configurations without fasteners.
What chair type works best under a sloped ceiling?
An armless task stool or a compact chair without fixed armrests is the most practical option. High-back ergonomic chairs with wide fixed armrests need more lateral clearance to rotate and exit the space. OSHA guidelines set under-desk leg clearance at 20 to 28 inches high,2 which most task stools satisfy. For ergonomic setup details in a compact desk space, see the article on ergonomic home office setup for small spaces.
Do I need a permit to add an outlet under the stairs?
In most U.S. jurisdictions, electrical work that opens walls or adds new circuits requires a permit and a licensed electrician. The specific requirements depend on the local authority having jurisdiction. Always confirm with your building department and a licensed electrician before starting any electrical work in a finished space. The planning decisions in this article do not substitute for that professional review.
How do I handle airflow in an enclosed under-stair workspace?
An enclosed alcove with no window and a running computer can build heat. A small portable fan at floor level or a USB-powered desk fan improves circulation without permanent installation. If overheating becomes a consistent issue, consult an HVAC professional about adding a supply vent from an adjacent conditioned space. This is a structural and code decision that requires a qualified specialist for the specific home.
Limitations and Edge Cases
- All ceiling-height estimates in the table above assume a standard IRC-geometry stair with a 7-3/4-inch maximum riser and 10-inch minimum tread. Older stairs built before current IRC adoption, or stairs with shallower treads, will produce different headroom profiles at the same horizontal distances.
- Figures are U.S.-based (IRC, OSHA, WELL v6). Residential stair codes and workplace ergonomics standards differ by country and jurisdiction; verify the applicable standard for your location.
- Any electrical circuit addition, framing modification, or duct work requires review by a licensed professional for the specific home. The planning steps here apply to measurement, layout, and furniture selection only.
References
Methodology: every figure cited below was drawn from an independent published source linking directly to the page that carries it; the planning framework in this article applies engineering-informed spatial reasoning to published ergonomics and building-code standards.
- OSHA – Computer Workstations eTool: Monitors. U.S. Department of Labor. Evergreen regulatory guidance.
- OSHA – Computer Workstations eTool: Desks. U.S. Department of Labor. Evergreen regulatory guidance.
- Building Code Trainer – Residential Stair Code Requirements, citing 2021 International Residential Code R311.7. Current edition.
- OSHA – 29 CFR 1910.36: Design and construction requirements for exit routes. U.S. Department of Labor. Evergreen regulatory text.
- Luminate Lighting Group – OSHA Office Lighting Standards Explained, citing ANSI/IES recommendations. Current.
- IWBI – WELL Building Standard v6, Feature 53: Visual Lighting Design. International WELL Building Institute. 2016 (active standard).
- U.S. Bureau of Labor Statistics – Telework Trends, Beyond the Numbers Vol. 14. BLS, 2024.
- Pew Research Center – Many Remote Workers Say They Would Be Likely to Leave Their Job If Required to Return Full-Time. January 2025 (survey October 2024).
Conclusion
The ceiling slope is the planning variable that separates a functional under-stair office from a space that gets used twice and abandoned. Map the headroom profile first, set the desk position from the ergonomic minimums, plan the lighting independently of the room, and route power before any wall is finished. Each step depends on the one before it; running them in order produces a layout that actually works.
For the broader compact workspace planning system, see the small home office planning overview on this site.