
Wall-mounting a television frees the surface area around it for shelving, but the layout decisions are easier to get wrong than they look. For the broader approach to walls and height, see the overview in Vertical Storage: A Complete Guide for Small Spaces. On this specific challenge, mounting the TV center at 42 inches from the floor1 is the anchor measurement that makes every shelf position predictable. Shelf depth, vertical spacing, device ventilation, and cable routing all follow rules that apply before the first bracket goes into the wall. This article walks through each decision in sequence, from screen height to the last closed cabinet door.
Quick Answer
How should floating shelves be arranged around a wall-mounted TV?
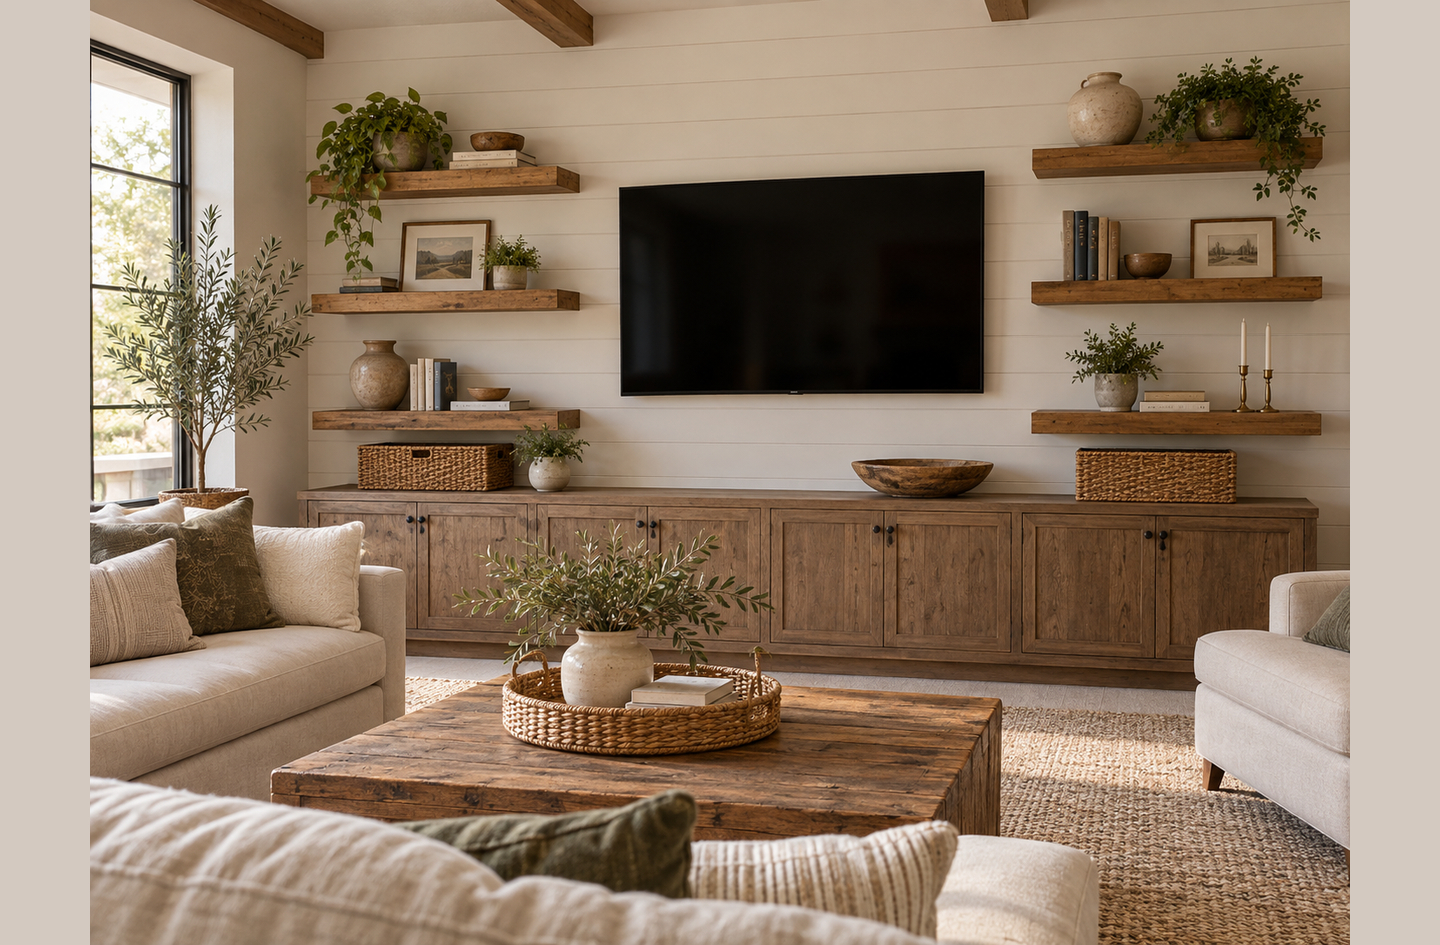
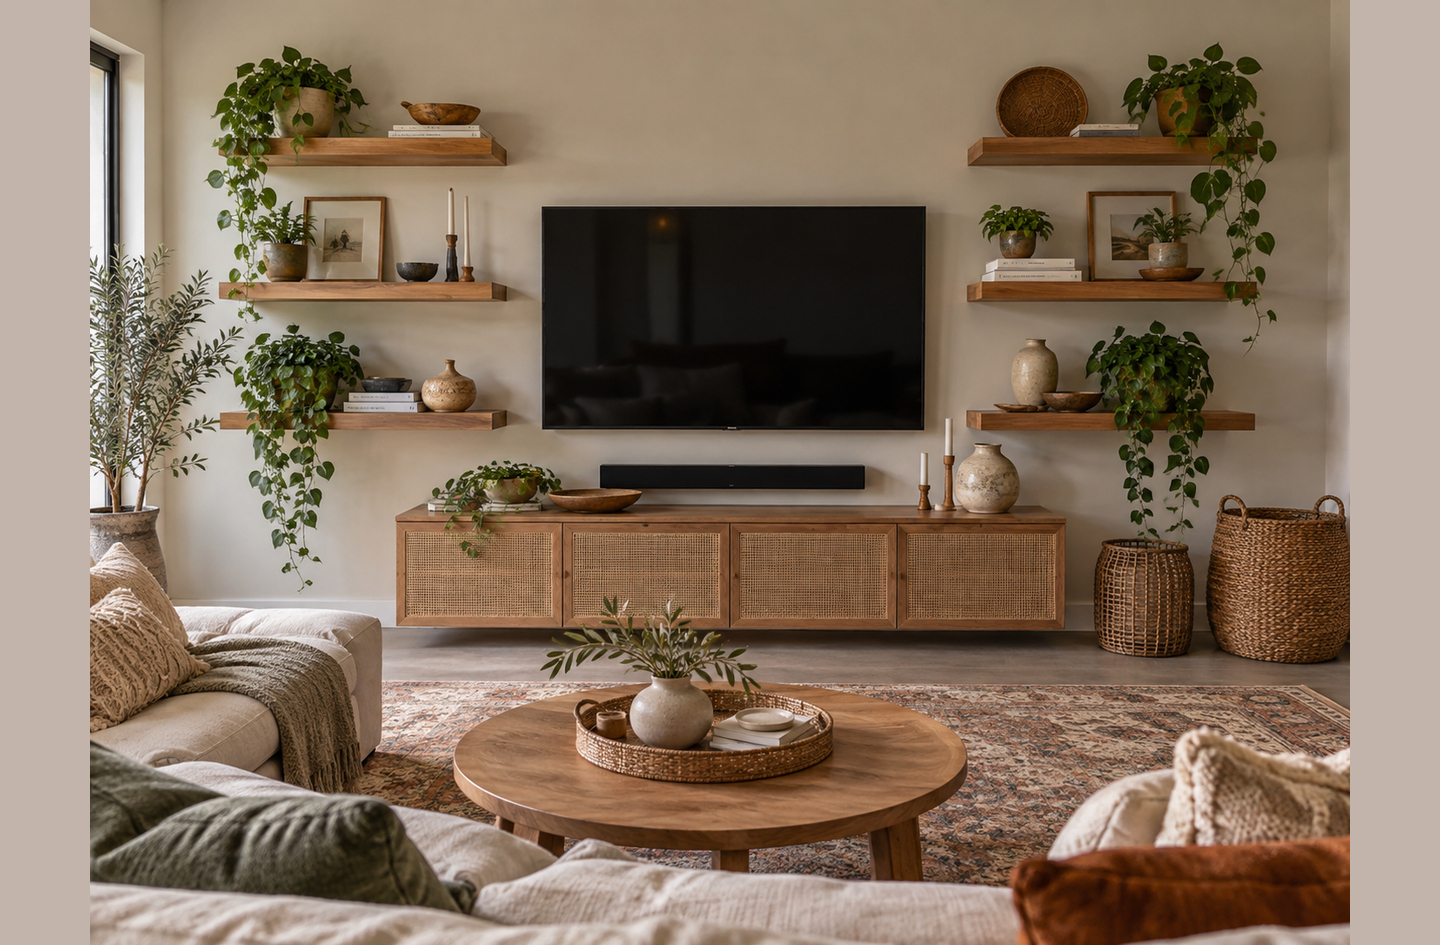
Mount the TV center at 42 inches from the floor, which is seated eye level for most adults.1 Plan shelves in three zones. The AV zone below the TV needs at least 14 inches of shelf depth6 and 16 inches of vertical clearance.7 The flanking sides hold books and display items. Above the TV, use lighter decorative objects. Route all cables before mounting any shelf.
Key Takeaways
- Mount the TV center at 42 inches from the floor;1 this seated eye level is the anchor for every shelf measurement that follows.
- AV equipment needs 16 inches of shelf height (versus 10-12 for decorative items),7 because a receiver chassis height plus 5 inches of required ventilation3 adds up to that minimum.
- Floating shelf brackets anchored into wall studs hold 45-50 lbs per stud attachment;4 a three-rod bracket hitting two studs supports more than 135 lbs total.4
- Shelf depth varies by zone: at least 14 inches below the TV for screens under 65 inches,6 and 8-10 inches on flanking shelves for display items.
- Cable routing belongs at the planning stage, before any bracket goes into the wall, not after.
What You’ll Need Before You Start
Getting the layout right the first time saves a lot of re-drilling. Gather these before you mark the wall:
- Stud finder (electronic, not magnetic)
- Level and pencil for layout lines
- Tape measure
- Brackets rated for the load you plan to put on each shelf
- Cable routing solution decided in advance: in-wall kit, surface cable channel, or a cable spine that runs behind the shelves
- Power outlet position confirmed: the outlet behind the TV should already be in place before shelves go up
Plan to spend 2-4 hours on a full six-shelf arrangement. The work is straightforward, but each shelf needs to be level independently and aligned vertically with the others. Difficulty: intermediate. If wall type is concrete, masonry anchors and drilling tools change the scope; consult a contractor for that case.
Step 1: Set the TV at the Right Height
By the end of this step, you have one horizontal mark on the wall that anchors everything else. The TV center goes at that mark. Every shelf, every zone, and every cable route references it.
The widely cited recommendation is to mount the center of the screen at 42 inches from the floor.1 A second independent source places the same target at 42 inches, noting that this puts the screen at seated eye level for the average adult.2 If your household skews shorter or taller, adjust by a few inches, but 42 inches is the right starting point before any personal adjustment.
How to mark the height
Sit in your main viewing seat and have someone measure from the floor to your eye level. That number is your personal target. For most households it lands between 40 and 45 inches. Mark that point on the wall in pencil. The TV bracket goes in so the center of the mounted screen lines up with the mark.
If the TV has not been purchased yet, use 42 inches as the placeholder. You can adjust the bracket position slightly once the screen arrives.
Why this step controls shelf placement
Once the TV center is fixed, the wall divides into three clear zones: the space below the TV, the space flanking it on both sides, and the space above. The height of the TV bottom (TV center minus half the screen height) sets the upper boundary of the AV zone below. The top of the TV sets the lower boundary of the light display zone above. All shelf heights are calculated from those two fixed points, not guessed independently.
THX recommends a 36 to 40-degree viewing angle for home theater settings,8 which also affects TV height in dedicated media rooms. For a standard small living room, the 42-inch seated eye-level rule takes priority because seating is closer and more flexible.
Step 2: Arrange Floating Shelves Around a TV in Three Zones
By the end of this step, the wall is marked with three labeled zones. You know which zone holds what, and you have a shelf count and rough spacing sketched out for each.
A media wall works as a weighted visual system. The TV is the heaviest element visually and physically. Heavier, denser items belong in the zone below it, where their visual weight is grounded. Lighter items (books, plants, small objects) belong at eye level flanking the TV. The smallest and lightest display pieces go above the TV, where placing heavy objects creates a top-heavy composition that feels unstable.
Zone below the TV
This zone runs from the floor to the bottom edge of the TV. Its job is to replace the floor console: it holds the AV receiver, streaming devices, gaming consoles, and any closed storage for cables and boxes. The depth requirement here is the most demanding of the three zones: at least 14 inches for TVs under 65 inches, and 16-18 inches for 75-inch and larger screens.6
In a small room, a wall-mounted shelf or floating media console at this depth eliminates the visual bulk of a floor-standing TV unit. The floor stays clear, which is one of the most effective ways to make a compact living room feel less crowded.
For planning the floating shelf layout in this zone, the detailed guidance on height and depth selection in floating shelves for small spaces covers the full set of height-depth trade-offs for this type of installation.
Zones flanking the TV
These run alongside the TV on both sides, at the same height band as the screen. The depth here should be shallower: 8-10 inches suits books, framed photos, small plants, and decorative objects. A shallow flanking shelf reads lighter and does not crowd the TV visually. This is where the display-focused shelving lives.
Symmetry is common but not required. Two shelves on each side at even spacing is the default. An asymmetric arrangement (three shelves on one side, two on the other) can work if the heavier visual weight on the deeper side is balanced by taller items on the shallower side.
Zone above the TV
This zone is for light items only: small plants, a few books laid flat, minimal decorative pieces. Nothing heavy should go above a wall-mounted TV. The shelves here can be shallower still (6-8 inches). Their primary function is to extend the vertical composition upward and avoid leaving a large blank wall above the screen.
For rooms with high ceilings, the planning framework in floor to ceiling shelves for small spaces applies to the upper zone. That guide helps size the spacing between top shelves.
Step 3: Choose the Right Shelf Depth and Load Rating
By the end of this step, you have selected shelf depths for each zone and confirmed that the bracket hardware can carry the intended load. Buying the wrong depth or underrating the brackets is the most common mistake that requires re-doing the installation.
Shelf depth is the measurement from the wall to the front edge of the shelf. It varies by zone:
- Below the TV (AV zone): 14 inches minimum for screens under 65 inches; 16-18 inches for 75 inches and larger.6
- Flanking the TV (display zone): 8-10 inches for books and objects.
- Above the TV (light display zone): 6-8 inches for small decorative items.
These depths are not interchangeable. A 10-inch shelf in the AV zone will not hold a standard AV receiver chassis, which typically measures 11-17 inches deep. A 14-inch flanking shelf reads as heavy and crowds the TV visually.
Load ratings: what the numbers mean
Floating shelf brackets that attach to wall studs hold 45-50 lbs per stud attachment.4 A bracket hitting two studs at 16 inches on center doubles that capacity to 90-100 lbs.4 A heavy-duty three-rod bracket attached to two studs can support more than 135 lbs of total load.4 Steel rod brackets anchored into studs can carry 175-470 lbs depending on rod count and installation depth.5
For the AV zone shelf, add up the weight of every device going on it before selecting brackets. A typical consumer AV receiver runs 17-30 lbs; add streaming devices and any gaming console. A single stud-attached rod bracket handles one receiver and a few light accessories. Two-stud attachment is the safer default when the shelf holds multiple components or anything heavy.
Drywall vs. stud anchoring
A wall stud is a vertical framing member inside the wall, typically spaced 16 or 24 inches apart, that provides a solid structural anchor for heavy loads. Drywall alone cannot support the loads described above. If studs do not align with your intended shelf positions, a French cleat or a wall-panel system that spans multiple studs is a better solution than drywall anchors for the AV zone shelf. For the lighter flanking and upper shelves, heavy-duty drywall anchors rated for 50 lbs are usually adequate for display-weight loads.
Step 4: Space Shelves to Handle Device Ventilation
By the end of this step, the vertical clearances between shelves in the AV zone are confirmed. Devices that overheat fail early. The shelf spacing that protects them is specific and measurable.
An AV receiver is the central amplification and signal-routing component in a home theater or multi-room audio setup. It generates significant heat in normal operation. Placing it in a closed or tightly stacked shelf without adequate clearance shortens its life and can cause shut-down events during use.
“The amount of space you need around an AV receiver is 5 inches (12.7 cm) above and 2 inches (5.1 cm) on each side.”
Home Theater Heroes, AV installation guide3
Translating that to shelf spacing: a typical receiver chassis height is 5-6 inches. Adding the 5 inches of clearance above it gives a minimum shelf-to-shelf height of 10-11 inches just for the device and its air space. Build in a few extra inches for cables and easy removal, and 16 inches of shelf spacing is the practical minimum for any AV component shelf.7
Streaming devices and gaming consoles are smaller and generate less heat. They still benefit from an inch or two of clearance above them, but do not require the full 16 inches. A shelf spaced 10-12 inches above a streaming stick or small media box is adequate. The 16-inch rule applies specifically to full-size AV receivers, amplifiers, and cable boxes with active ventilation slots.
Closed cabinets and ventilation
If the plan includes closed doors on the AV zone shelf, add 20-30% to the required clearances. A sealed cabinet traps heat faster than an open shelf. Some cabinet designs include built-in ventilation slots or can be fitted with small fans. If the cabinet has a back panel, route a cable channel through it so hot air has an exit path. This is an engineering-informed planning step, not a certified safety specification; if the setup involves a home theater amplifier rated above 100 watts per channel, consult the manufacturer’s installation guide for specific clearance requirements.
Step 5: Route Cables Before You Mount Anything
By the end of this step, you have a complete cable routing plan and the in-wall or surface routing is in place before the first shelf bracket goes into the wall. Cable management is the step most people defer. Once the shelves are up, adding clean cable routing is significantly harder.
Cable management refers to routing, concealing, and organizing the electrical and AV cables that connect a mounted TV, streaming devices, and audio equipment, so they are not visible in normal use.
In-wall routing
The cleanest result runs the TV power cord and HDMI cables inside the wall through a low-voltage cable management kit. These kits include two wall plates (one behind the TV, one at the outlet level below) and a flexible conduit or raceway between them. Low-voltage wiring does not require an electrician in most jurisdictions, but any new outlet work does. If the outlet needs to be moved or added behind the TV, that is a licensed electrician’s scope, not a DIY task.
Plan the cable entry and exit points before mounting shelves. A shelf mounted over a cable exit point blocks the installation.
Surface cable channels
For renters or for walls where in-wall routing is not practical, paintable surface cable channels run along the baseboard or up the wall behind the shelves. They conceal cables without drilling through the wall. The channel depth (typically 3/4 inch to 1.5 inches) needs to accommodate the bundle of cables running through it. Plan the channel route before mounting shelves so the shelves do not block access to the channel ends.
Cable bundling at devices
At the AV zone shelf, cables from each device route neatly with cable ties or velcro straps. Use short HDMI cables that reach the next device without a loop. Power strips designed for AV cabinets have multiple outlets in a row, which keeps the power bundle flat and easy to manage. Label cables on both ends before routing them; finding which cable belongs to which device after shelves are in place is a frustrating process.
For over-the-door cable and accessory storage that supplements a wall-mounted setup, the selection guide for over-the-door organizers for small spaces covers options that work in rooms where floor space and wall space are both limited.
Step 6: Mix Open Shelves with Closed Storage
By the end of this step, you have decided which shelf positions will be open and which will use doors, drawers, or bins. The ratio between the two determines how the media wall reads visually and how easy it is to maintain.
All-open shelves look clean in a freshly styled photo and cluttered within two weeks of daily use. Devices accumulate cables, remote controls, game cases, and small accessories. Without closed storage, the AV zone becomes a visible tangle. A mix of roughly 60-70% open shelving (for display items) and 30-40% closed storage (for devices and accessories) balances visual calm with practical function.
What belongs in closed storage
Closed storage suits the AV zone below the TV: the receiver, gaming consoles, cables, routers, hard drives, and anything with visible wiring or a busy surface design. A drawer or door below the TV eliminates that visual complexity without hiding the screen itself. Fabric bins on a low open shelf are a renter-friendly alternative to cabinet doors when wall-mounting is restricted.
What stays open
Open shelves suit the flanking display zone: books, plants, framed photos, speakers, and small objects that are intentionally visible. These shelves work best with deliberate editing – fill them to roughly 70% capacity rather than 100%, leaving visible negative space between objects. Overcrowded open shelves look the same as no shelving at all, just with more things in them.
A media console is a low, wide storage unit designed to sit below a TV and hold AV components, media, and accessories. A wall-mounted floating shelf at console height (14-18 inches deep) functions as an open-format media console and eliminates the visual weight of a floor-standing cabinet while serving the same role.
Renter-friendly closed storage
If wall-mounting is restricted by a rental agreement, a freestanding media tower alongside the TV wall achieves the same result. No permanent attachment is needed. The guide on tall narrow shelving for small spaces covers how to choose a freestanding unit that works next to a wall-mounted screen.
Common Mistakes to Avoid
These four mistakes account for most failed media wall installations in small rooms. Each has a specific fix.
Mounting the TV too high
The mistake: placing the TV center at 55-65 inches from the floor because it looks like the right height when standing. The consequence: neck strain during seated viewing and a visual center above the natural eye line, which makes the room feel pulled upward. The fix: measure seated eye level before drilling the bracket. For most households, 40-44 inches to screen center is the correct range.2
Skipping ventilation planning
The mistake: selecting shelf spacing based on aesthetics or available bracket positions rather than device clearance. The consequence: a receiver or amplifier that runs hot, triggers thermal shut-downs, or fails within 2-3 years. The fix: confirm the physical height of every device going on the AV shelf and add 5 inches of clearance above it, resulting in at least 16 inches of shelf-to-shelf spacing.3
Running cables after shelves are mounted
The mistake: mounting all shelves first, then trying to route cables around and behind them. The consequence: cables that drape over shelf edges, visible bundles at the back of the AV zone, and the need to remove shelves to route an in-wall conduit properly. The fix: plan the cable route first, install any in-wall kit or surface channel second, and mount shelves last.
Using the same shelf depth everywhere
The mistake: ordering all shelves in one depth (commonly 10 inches or 12 inches) for visual uniformity. The consequence: the AV zone shelf is too shallow to hold a full-size receiver, or the flanking display shelves are too deep and make the room feel narrow. The fix: use three depths – 14-16 inches below the TV, 8-10 inches flanking, and 6-8 inches above – matching depth to function.
What the Finished Media Wall Should Look Like
If the planning was followed, the finished installation has these specific, verifiable characteristics:
- The TV center sits at or within 2 inches of seated eye level; no neck tilt is required to watch from the main seating position.
- The AV zone shelf below the TV holds all devices with at least 5 inches of clear air space above each one.
- No cable is visible from the main viewing position; all cables either run inside the wall or disappear into a surface channel at baseboard level.
- The flanking shelves look intentionally styled at roughly 70% capacity, not empty and not overloaded.
- The closed storage below the TV hides the high-visual-noise items (cables, remote controls, game cases) behind a door or bin.
The result functions as a replacement for a floor-standing TV console, adds vertical storage across the full wall height, and leaves the floor clear. Square footage is fixed, but the vertical plane is still open, and a well-planned media wall uses most of it.
Frequently Asked Questions
How high should floating shelves be around a TV?
Mount the TV center at 42 inches from the floor, the standard seated eye level for most adults.1 Flanking shelves can run from floor level up to the top of the TV or higher. The first shelf below the TV typically sits at the bottom edge of the screen; flanking shelves usually start 12-16 inches from the floor, matching the zone function.
What depth should floating shelves be near a TV?
Shelf depth varies by zone. Below the TV, use at least 14 inches for screens under 65 inches, or 16-18 inches for 75-inch and larger screens.6 Flanking shelves should be 8-10 inches deep for books and display items. Shallower flanking shelves read lighter and do not crowd the TV visually.
Can floating shelves hold the weight of AV equipment?
Yes, if the brackets are anchored into wall studs. Rod-style floating shelf brackets anchored into wall studs hold 45-50 lbs per stud attachment.4 A bracket hitting two studs handles 90-100 lbs. A heavy-duty three-rod bracket at two studs supports more than 135 lbs. Drywall anchors alone are not suitable for AV equipment loads.
How do I hide cables when using floating shelves around a TV?
Plan cable routing before mounting any shelf. In-wall low-voltage cable management kits run the TV power cord and HDMI cables inside the wall between two wall plates. For rentals or walls where drilling is restricted, paintable surface cable channels along the baseboard conceal cables without structural work. Any new outlet work requires a licensed electrician.
Should floating shelves around a TV be symmetrical?
Symmetry is common but not required. Two or three shelves on each side at even spacing is the default. Asymmetric arrangements can work if the heavier visual items on the deeper side are balanced by taller objects on the shallower side. What matters more than symmetry is matching shelf depth to zone function and keeping lower shelves visually heavier than upper ones.
Limitations and Edge Cases
- This guide covers standard wood-stud drywall construction. Concrete, brick, or steel-stud walls require different anchor systems and installation methods; consult a contractor for those substrates.
- The ventilation clearances here are based on published guidance for standard AV receivers. High-powered amplifiers, custom home theater setups, and professional audio equipment may require additional clearance; check the manufacturer’s installation documentation for those cases.
- TV positioning assumes typical living room seating at 8-12 feet. Very deep rooms or projection screen setups change the viewing angle math; the vertical storage hub covers wall planning for different room configurations.
References
Methodology: every figure in this article comes from an independent published source verified live before publication; each reference links directly to the page carrying the data, and the article is reviewed for accuracy before each update.
- HelloTech – How High Should a TV Be Mounted?, The Plug editorial team, May 2023.
- Mount-It! – Find Your Ideal TV Mounting Height, Jan Veroti, June 2025.
- Home Theater Heroes – How Much Space Do You Need Around an AV Receiver?, March 2025.
- Shelfology – How Much Weight Can a Floating Shelf Hold?, Tony Jefferson, January 2025.
- Right On Bracket – How Much Weight a Floating Shelf Bracket Can Hold, October 2020.
- Ashdeco – Floating Shelf Under TV: Is It Safe? (Weight and Size Guide), June 2026.
- RackReview.blog – How High Should a Shelf Be: Ideal Heights Guide, June 2026.
- Seatcraft – Home Theater Seating Distance Guide, citing THX recommendations, January 2026.
Conclusion
A media wall built around a wall-mounted TV earns every inch of wall space when the height, depth, spacing, and cable routing are planned in the right order. Start with the TV center at 42 inches, set shelf depths by zone, confirm ventilation clearance for AV equipment, and route cables before the first bracket goes in. The result is a storage system that functions as a media console replacement while leaving the floor clear.
For the full planning approach to walls and height throughout a small home, see the overview in vertical storage for small spaces.