
In a compact home, floor space is a fixed resource, but the vertical dimension is almost always underused. Floor to ceiling shelves can turn a single wall into 105 usable inches of organized storage in a typical nine-foot room, adding real capacity without claiming any floor area. That matters: a 2025 survey by StorageCafe, a self-storage directory service, found that 35% of self-storage renters cite insufficient home space as their reason for renting off-site.1 This guide is a companion to the overview of vertical storage for small spaces and covers the specific planning decisions that make full-height shelving work in practice, from ceiling measurement to zone assignment to anchoring for real load.
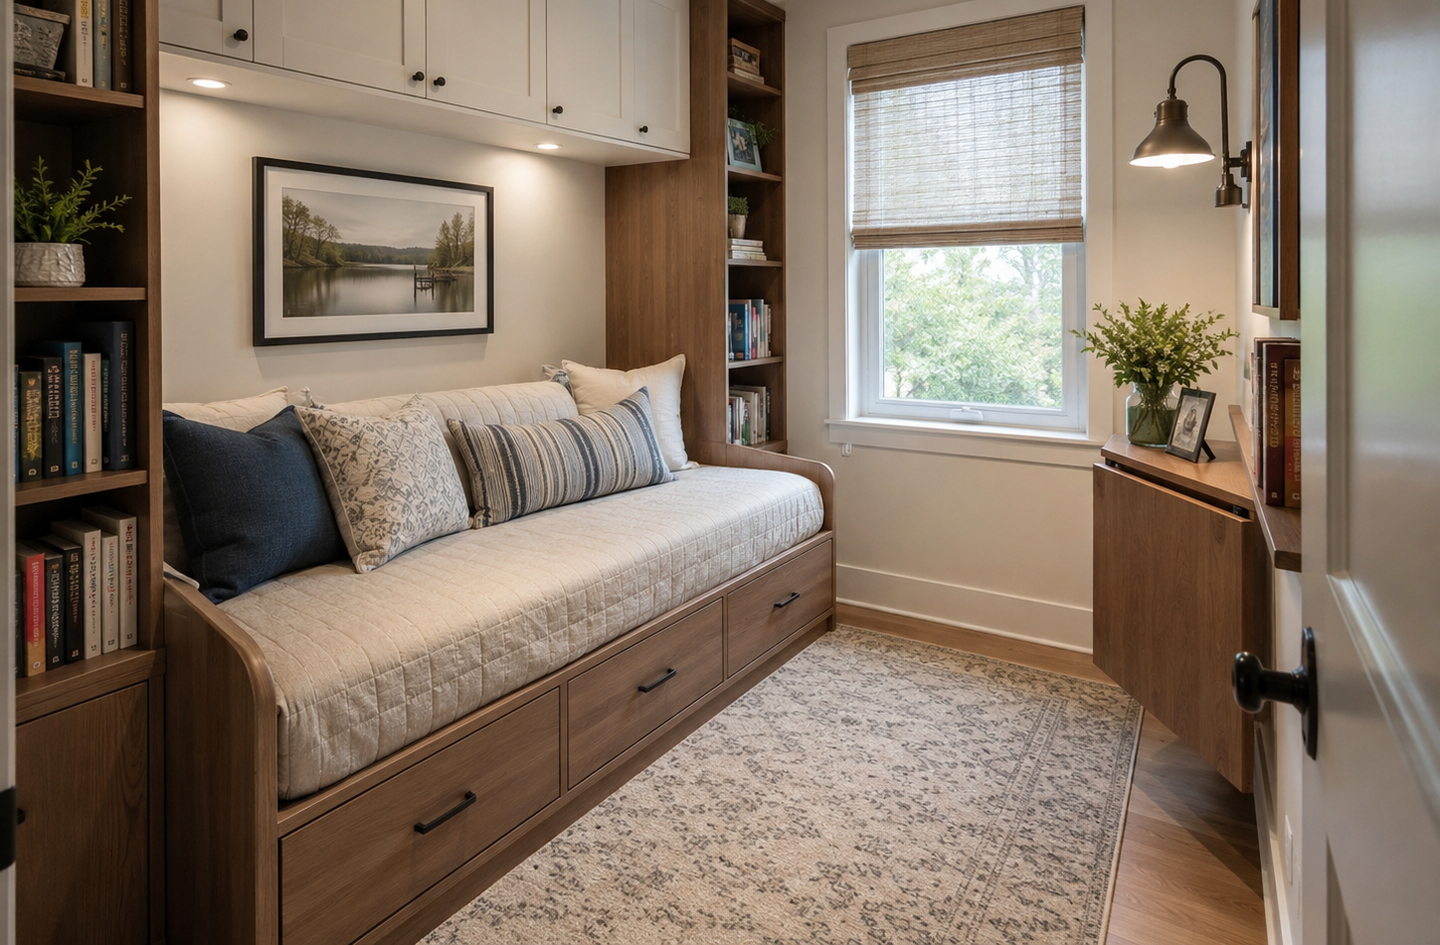
Quick Answer
How do you plan floor-to-ceiling shelves for a small space?
Measure your ceiling height (most US homes built after 2000 have 9-foot ceilings3), then divide the vertical run into five zones. Place everyday items between 15 and 48 inches off the floor, which the US Access Board defines as the unobstructed forward reach window.4 Set shelf depth by content (10 to 12 inches for books, 14 to 16 inches for pantry items). Fix the lower shelves, keep the middle sections adjustable, and anchor any loaded unit into wall studs rather than drywall alone.
Key Takeaways
- A standard nine-foot ceiling gives approximately 105 usable vertical inches after clearance, enough for 8 to 11 shelves depending on the interval.
- The ADA comfort reach window, 15 to 48 inches off the floor, defines the prime zone where daily-use items belong.
- Shelf depth should taper from wider at the base (14 to 16 inches for pantry, 10 to 12 inches for books) to shallower above 65 inches to reduce visual weight and keep high-shelf items accessible.
- Stud mounting is more reliable than drywall anchors for any unit carrying real storage weight. A lag screw into a wood stud can resist 212 to 266 lbs per inch of thread penetration.7
- A fixed lower section plus adjustable middle shelves is the practical configuration for most small-space installations.
Before You Begin
Floor-to-ceiling shelving is a planning problem before it is a purchasing problem. Confirm three conditions before you measure anything.
A clear target wall. The wall should be free of HVAC vents, electrical panels, full-height windows, or doors that interrupt the shelving run. A wall with a centered window can still work if you run shelving on both sides, treating it as a visual break.
Your stud layout. You will need a stud finder to locate studs. Most US residential walls use 16-inch on-center framing; some older homes and 2×6-framed walls use 24 inches. The stud positions determine where you can safely anchor uprights and brackets. Mark stud centers at three heights on the wall and confirm all three align before treating each location as confirmed.
Your ceiling type. Standard gypsum board ceilings are the easiest case. Concrete ceilings (common in urban condos and basement conversions) require masonry anchors and, for heavy loads, a conversation with a qualified contractor before installation. Angled ceilings (attic conversions, sloped rooms) change the geometry entirely and may require custom-height units cut to match the slope.
What you will need:
- Tape measure and 4-foot level
- Stud finder
- Pencil and paper for sketching the zone plan
- Estimated planning time: 30 to 45 minutes
- Difficulty: Beginner to intermediate for modular systems; intermediate to advanced for custom built-ins or work requiring carpentry
This guide covers planning decisions. For any work involving wall penetrations, electrical or HVAC modifications, or structural changes in a rented property, confirm with a qualified contractor or your landlord before beginning.
Step 1: Measure Your Ceiling and Map the Wall
By the end of this step you will know exactly how many vertical inches you are working with and where your studs fall, so every anchoring and zone decision has a real number behind it.
Take a floor-to-ceiling measurement at the left edge, center, and right edge of the planned span. In older construction, ceiling heights can vary by up to a full inch across a single wall due to settling. The shortest reading is your planning height, since the unit must clear the ceiling everywhere it runs.
“nine- and ten-foot ceilings are now common, not only in living rooms and kitchens, but also in bedrooms.”
Witold Rybczynski, professor of urbanism, University of Pennsylvania3
The International Residential Code sets a minimum ceiling height of 7 feet (84 inches) for habitable rooms.2 In practice, most US homes built after 2000 have 9-foot (108-inch) ceilings as the market standard. That gives you roughly 105 usable vertical inches after subtracting a 1- to 3-inch clearance gap at the top of the unit. The gap is not optional: a unit built to exact ceiling height with no tolerance can bind in summer when wood or engineered panels expand slightly with humidity, and it requires the full diagonal of the unit to be shorter than the ceiling height for installation, which rarely works without building the unit in place.
After measuring ceiling height, locate and mark every stud across the planned span. Mark stud centers with a light pencil mark at mid-wall height. At standard 16-inch spacing, a six-foot wall section will contain approximately four usable stud positions. Confirm each one with a second pass at a slightly different height. Sketch the wall on paper: record the ceiling height, stud positions in inches from the left edge, and any fixed obstacles (outlets, switches, vents). This sketch is your planning document for every step that follows.
Step 2: Choose Shelf Depth for Your Content
Shelf depth is the most commonly under-planned dimension in floor-to-ceiling shelving. Most people choose a single depth for the whole unit based on what looks proportional to the wall, then discover that the high shelves are impractical and the unit feels visually heavier than expected. The correct approach is to set depth by what each zone will actually hold, and to let depth taper as the shelves go up.
The table below shows recommended depths by content type, based on architectural reference standards.5
| Content Type | Recommended Depth | Notes |
|---|---|---|
| Paperbacks | 6 to 8 inches | Narrow; keeps visual weight low on upper shelves |
| Standard hardcovers and trade paperbacks | 10 to 12 inches | Fits most residential book collections |
| Pantry and kitchen containers | 14 to 16 inches | Accommodates most standard food storage containers |
| Shelves above 65 inches | 10 to 12 inches maximum | Deeper shelves at height make rear items inaccessible |
| General household objects and bins | Up to 16 inches | Beyond 16 inches creates a reach problem in daily retrieval |
For pantry depth planning in a kitchen context, see our small kitchen storage guide.
The rule on high shelves is worth emphasizing separately. When a shelf sits above shoulder height, a depth greater than 12 inches means items at the back of the shelf require a step stool plus a reach that puts the user off-balance. If you plan to store anything on shelves above 60 to 65 inches from the floor, cap those shelves at 10 to 12 inches of depth. This is much harder to correct after installation than it is to plan before.
Visual weight is the second reason to taper depth from base to top. A uniform-depth floor-to-ceiling unit carries a lot of visual mass that reads as heavy and dominating in a small room. Stepping from 16 inches at the base to 12 inches at mid-height to 8 or 10 inches at the top creates a profile that reads as graduated and lighter against the wall, even though the total storage volume changes only modestly. For a built-in or a modular system being assembled with multiple depth options, plan this taper from the start. Retrofitting it later is a rebuild.

Step 3: Plan Your Vertical Zones
This is the planning step most people skip, and it is the one that determines whether a floor-to-ceiling shelf system actually improves daily life in a small space or just adds storage capacity that is inconvenient to use.
The starting point is a principle from ergonomics rather than interior design: your body retrieves things most efficiently within a specific height window, and that window is narrower than most storage systems account for. The US Access Board’s ADA Standards for Accessible Design define unobstructed forward reach limits used across many built environments: the comfort zone runs from 15 inches off the floor to a maximum of 48 inches.4 That 33-inch band between roughly knee height and mid-chest is where you can reach any point on a shelf face without bending, crouching, or stretching. It is also where retrieval is fastest, most comfortable, and least likely to cause strain over a long period of daily use.
“Employees often reach above shoulder height to access products on upper shelves. This causes stress to the shoulders and back.”
OSHA, Ergonomics eTools, US Department of Labor6
The planning error that creates a frustrating floor-to-ceiling shelf system is treating it as a top-to-bottom filing problem: fill the shelves from the top down, placing large items up high where they fit, and working down to smaller items. The correct sequence runs the other direction. Start with the things you retrieve every day and assign them to the most ergonomically accessible zone first. Let the ceiling zone be for items you measure in months of access frequency, not days. The ceiling is an asset, not a priority location.
The chart below synthesizes ADA Standards Section 308.2.1 with OSHA ergonomics guidance to map a 9-foot room into five planning zones.
Here is how the zones translate to specific shelf planning decisions.
Prime Zone (18 to 48 inches): plan this first
This is the zone where most of your daily storage should live. Books you read regularly, supplies you reach for most mornings, frequently used kitchen or office items, anything that needs to be put away and retrieved in under three seconds: all of it belongs in this window. At 18 to 48 inches, you can reach any point on a shelf face without adjusting your body position. For most adults, this zone also gives full sightline access to shelf contents, which eliminates the search delay that makes storage systems feel frustrating to use.
Plan the highest shelf density here at shorter intervals (8 to 12 inches depending on content), full-width organization, and the most adjustable configuration so you can reconfigure as needs change. Do not waste the prime zone on items you access once a month.
Low Zone (6 to 18 inches): heavy items, not daily items
The low zone requires bending to retrieve anything. That is not a problem for access that happens once a week or less, but it creates meaningful friction if you are reaching into it multiple times a day. Use it for heavy items that benefit from a stable, low center of gravity (large storage bins, seasonal equipment cases, bulk pantry items, anything you move infrequently), and leave the lowest 6 inches as clearance, or close it with a base cabinet door, since that zone requires crouching to access and collects dust.
Upper and High Zones (48 inches to ceiling): seasonal and archival
Everything above 48 inches requires some reach or stretch, and everything above 65 inches requires a step stool for most adults. These zones are not dead space in a compact home: they hold real storage value for items you rotate seasonally (extra bedding, holiday decorations, off-season clothing), items you archive (documents, reference books, rarely accessed materials), and lightweight items that are straightforward to retrieve even from height. The upper zone between 48 and 65 inches suits items you need a few times per month, provided nothing in it requires two hands to retrieve while standing on your toes.
Step 4: Choose Fixed vs. Adjustable Shelf Sections
By the end of this step you will have a clear decision on which shelves get fixed mounting and which stay adjustable, matched to the zone plan from Step 3.
Fixed shelves are structurally superior. A shelf permanently attached to uprights or the wall carries more load per linear foot and does not depend on the holding strength of shelf pins or clip rails. For the low zone (below 18 inches) and any shelf carrying heavy bins or equipment, fixed mounting is the correct choice. For a custom built-in or site-built unit, the base shelf (first shelf 6 to 8 inches off the floor) and the top shelf should always be fixed. These two points define the structural frame of the unit.
Adjustable shelves offer flexibility in the prime zone and upper zone. In a small home where one room does several jobs, storage needs change: a shelf height that worked for paperbacks last year may need to change this year to accommodate taller containers. Adjustable shelves let you reconfigure intervals without rebuilding. The trade-off is quality dependency: the adjustability is only as reliable as the shelf pin or clip rail system. If you are buying a modular system, verify that shelf pins seat fully in their holes and rail channels are reinforced at the upright mounting points before purchasing.
A practical configuration for most small-space floor-to-ceiling shelving:
- Fixed: The base shelf, any shelf designated for a specific appliance or piece of equipment with a known height, and the top shelf if the unit will carry load near the ceiling.
- Adjustable: All shelves in the prime zone (18 to 48 inches) and the upper zone (48 to 65 inches), so intervals can adapt as storage needs change.
- Fixed again: Any shelf that will carry dedicated, uniform-height containers (a pantry row of identical jars or a row of magazine files, for example) can be fixed once you confirm the interval works. Adjustability you will never use adds cost without benefit.
For modular shelving systems, the adjustable option is typically built in. For custom built-ins, the choice between dadoes (fixed) and pin rails (adjustable) must be made at the design stage; changing it afterward is a rebuild, not an adjustment.
Step 5: Anchor the Unit for the Load It Will Carry
A loaded floor-to-ceiling shelf unit exerts force on the wall in three ways: downward compression at the base, outward pull at the top anchor points, and lateral racking force when the unit is bumped or when load shifts unevenly across shelves. Anchoring needs to address all three, not just the most obvious one (top pull).
Stud mounting: the correct method for any loaded unit
A 5/16-inch lag screw installed into a standard wood-framed wall stud can resist withdrawal forces of 212 lbs per inch of thread penetration in close-grain hem fir and redwood, and up to 266 lbs per inch in Douglas fir, based on American Wood Council National Design Specification data.7 At 1.5 to 2 inches of thread engagement in a 2×4 stud, that is a substantial amount of withdrawal resistance per anchor point. A typical floor-to-ceiling shelf unit needs 2 to 4 wall anchor points; hitting studs at those points means the unit can carry real load without relying on the drywall for resistance.
To reach a stud, the top anchor point of your unit needs to align with one of the stud positions you mapped in Step 1. If the unit’s upright spacing does not coincide with the 16-inch stud grid, you have two practical options: install a horizontal ledger board (a piece of lumber or plywood running horizontally across multiple studs) and mount the shelf unit to the ledger, or use a wall-mount rail system that spans multiple studs and distributes the shelf load across those stud connections.
Drywall anchors: acceptable for light loads only
When stud alignment is not possible, heavy-duty toggle bolts offer a secondary option. A TOGGLER SNAPTOGGLE 1/4-inch toggle bolt is rated at up to 238 lbs in half-inch standard drywall under manufacturer-specified installation conditions.8 That figure is a maximum, not a working load recommendation: real-world capacity varies with drywall condition, anchor spacing, and the direction of applied force. For a lightly loaded shelf unit in a rental where drilling into studs is not permitted, heavy-duty toggle bolts can provide adequate resistance. For a unit carrying books, pantry goods, or heavy storage bins, stud anchoring is the appropriate choice.
In a rental where wall penetrations are restricted, freestanding modular systems that use compression-fit uprights (tensioning between floor and ceiling) are the correct approach. They require no wall anchors and leave no damage, though they carry less weight than a stud-anchored unit. Our small bathroom storage guide covers how the same systems apply in tighter rooms.
Step 6: Solve Access to High Shelves
By the end of this step you will have a practical system for retrieving anything above 65 inches without a physical risk each time.
The access challenge on high shelves is not just height. It is the combination of height, reach depth, and the difficulty of handling objects while elevated. A step stool addresses the height portion but does not eliminate the access friction entirely if the stored items are heavy, stored more than 10 inches from the shelf face, or require two hands to carry while descending.
A dedicated step stool stored within the shelving system
A two-step folding library stool (typically 9 to 14 inches wide when folded) can be stored on the lowest shelf or in a base cabinet when not in use. Keeping it within the shelving system eliminates the need to retrieve it from another room before accessing upper shelves, which is the friction that usually causes people to stop using high shelves altogether. The stool should have non-slip feet and a top step wide enough to stand on with both feet flat. A stool rated at 225 lbs or more at the top step handles most adults comfortably.
Reduce retrieval difficulty by limiting what you store at height
Three rules for shelves above 65 inches keep the access problem manageable: store lightweight items only (so single-hand retrieval is possible), use shallow shelves (10 to 12 inches maximum, per Step 2), and use labeled bins or containers so you can identify what you need before you climb. These rules reduce the number of times you need to climb and the time spent searching once you do. If you find you are regularly climbing to retrieve something that is not labeled and is heavier than expected, it belongs lower in the prime or low zone, not at height.
Pull-down hardware for the upper zone
In kitchen or pantry applications, pull-down shelf hardware lets contents above 65 inches swing down to counter height without a step stool. Installation requires a cabinet interior with defined clearance, and the hardware reduces load capacity on those shelves. It suits upper-zone storage holding small appliances or frequently rotated pantry items.
Common Mistakes to Avoid With Floor to Ceiling Shelves
Planning a single uniform depth from floor to ceiling
Uniform depth looks clean on paper but creates two problems: deep high shelves where rear items become permanently unreachable without a step stool, and visual mass that reads as heavy in a small room. The fix is to step depth down as you go up. A reduction from 14 inches at the base to 10 inches at mid-height to 8 inches above 65 inches eliminates the high-shelf access problem and noticeably lightens the visual profile.
Filling the prime zone with infrequently used items
The most common operational mistake in floor-to-ceiling shelving is storing infrequently used items in the 18-to-48-inch prime zone during setup, then pushing daily-use items to the upper or lower zones. Once the unit is loaded, that mismatch generates friction in every daily interaction: bending for the coffee grinder every morning, stretching for the notebook you use every afternoon. Map your access frequency to your zone plan before installation, not during it. The prime zone is reserved for the items you reach for most often.
Relying on drywall anchors for a loaded unit
Plastic expansion anchors and light toggle bolts work adequately for a small floating shelf. For a floor-to-ceiling unit carrying real storage weight, they do not provide enough withdrawal resistance for the leverage a tall unit creates at its top anchor points. The failure mode is a sudden pull-out when the unit is nudged, not a gradual sag. Any unit carrying books, pantry goods, or clothing bins belongs on studs, not drywall alone; if studs are not reachable at the anchor locations, install a horizontal ledger board across multiple studs.
Skipping the ceiling clearance gap
A unit built to exact ceiling height is extremely difficult to install: you must tilt it from horizontal to vertical inside the room, which requires the diagonal to be shorter than the ceiling height. For most unit widths, that math fails without damaging the ceiling or the unit. Leave 1 to 3 inches of clearance at the top and fill the gap with a trim piece or crown molding after installation. The visual result is the same as a flush fit; the installation is far more manageable.
Frequently Asked Questions
How much weight can floor-to-ceiling shelves hold?
Load capacity depends on shelf material, span between supports, and anchoring method. A properly anchored shelf with supports every 24 to 32 inches typically carries 20 to 50 lbs per linear foot in standard wood or engineered panel construction. Units anchored into studs with lag screws rated at 212 to 266 lbs per inch of thread embedment7 resist significantly more force than drywall-only anchors. Always check the manufacturer’s rated load for modular systems and do not exceed it.
Do floor-to-ceiling shelves need to be anchored to the wall?
Any shelf unit that reaches ceiling height should be secured to prevent tipping. Wall anchoring into studs is the standard approach for permanent installations. In rental situations where wall anchors are not permitted, freestanding compression-fit units (which tension between floor and ceiling without wall attachment) are a practical alternative. These carry less load than a stud-anchored unit but leave no wall damage and are appropriate for lighter storage needs.
What is the standard depth for floor-to-ceiling bookshelves?
A standard residential bookshelf runs 10 to 12 inches deep, which accommodates most paperbacks and standard hardcovers.5 For shelves above 65 inches from the floor, 10 to 12 inches is also the recommended maximum to keep items accessible without an extended overhead reach. Lower shelves intended for pantry or general storage typically run 14 to 16 inches deep.
Can you install floor-to-ceiling shelves in a rental apartment?
Yes, using the right system. Freestanding modular units with adjustable compression feet or tension poles require no wall anchors and leave no damage. For units that do require anchors, check your lease first; if anchoring into studs is permitted, small screw holes can typically be patched and painted on move-out with no deduction. Always confirm wall penetration rules with your landlord before beginning any installation.
How many shelves can fit in a 9-foot ceiling room?
A 9-foot (108-inch) room with roughly 105 usable vertical inches typically fits 8 to 11 shelves depending on the interval. An 8-inch interval (suitable for books and small objects) yields about 11 shelves. A 12-inch interval (suitable for taller containers) yields about 8 shelves. The prime zone from 18 to 48 inches will hold 3 to 4 of those shelves regardless of the overall count, which is where the majority of daily-access storage should concentrate.
References
- StorageCafe – 1 in 3 Americans Rent Self Storage as Space Shortages Grow, StorageCafe research team, 2025. Survey of 2,824 US respondents conducted December 2024 to February 2025.
- Minnesota Office of the Revisor of Statutes – Rule 1309.0305, adopting International Residential Code Section R305.1 Ceiling Height requirements. IRC 2021 edition.
- Wharton Zell-Lurie Real Estate Center – Ceiling Heights in Homes and Offices, Working Paper 678, Witold Rybczynski, University of Pennsylvania.
- US Access Board – Chapter 3: Operable Parts, ADA Standards for Accessible Design, Section 308.2.1 Unobstructed Forward Reach. Current edition.
- Dimensions.com – Pantry Storage Depths. Architectural reference database for standard residential storage dimensions.
- OSHA, US Department of Labor – Ergonomics eTools: Grocery Warehousing – Storage. Guidance on overhead-reach ergonomic risk in storage environments.
- American Wood Council – National Design Specification for Wood Construction, 2018 edition. Table 12N: Lag Screw Reference Withdrawal Design Values (W) for sawn lumber. Basis for 5/16-inch lag screw withdrawal values in Douglas fir and hem fir.
- TOGGLER – SNAPTOGGLE Heavy-Duty Toggle Bolt Carbon Steel, manufacturer product specification. Rated capacity: up to 238 lbs in 1/2-inch standard drywall.
Conclusion
Floor-to-ceiling shelving works in a small space when the planning sequence runs in the right order: measure first, zone by access frequency, set shelf depths by content type, decide the fixed-to-adjustable split, anchor for the actual load, and solve the high-shelf access problem before installation, not after. The zone plan is the piece most people skip, and it is the one that determines whether a floor-to-ceiling system improves daily life or simply adds storage that is inconvenient to use.
The ADA comfort reach window (15 to 48 inches) is where your body retrieves things most comfortably. Build your most-used storage there first, let the low zone carry heavy and infrequent items, and reserve the ceiling zone for storage measured in months rather than days. Square footage is fixed; how you allocate the vertical dimension is not.
For broader context on how full-height shelving fits into a whole-room storage plan, see Vertical Storage: A Complete Guide for Small Spaces.