The average U.S. studio apartment measures 457 square feet.6 In a space so compact, every wall is a potential storage column. Floating shelves convert blank walls into usable vertical space without adding anything to the floor, but the gains disappear when shelves land at the wrong height, run too deep, or fail under weight. This article answers the planning questions that determine whether floating shelves for small spaces actually work: how high, how deep, how far apart, and what belongs where. For the broader vertical storage framework, see the vertical storage overview at Small Space Logic.
Quick Answer
What are the key measurements for floating shelves in a small space?
Install daily-access items between 36 and 60 inches from the floor, where forward reach is comfortable without bending or straining. Keep shelf depth at 8 to 10 inches for most rooms, 6 to 8 inches in bathrooms, and 10 to 12 inches in kitchens. Space shelves 12 to 15 inches apart vertically for standard household items. Anchoring into a wall stud supports approximately 50 lbs per stud,4 while drywall-only installation tops out around 15 to 25 lbs.4
Key Takeaways
- The ADA defines the unobstructed forward reach range as 15 to 48 inches above the floor; for standing adults the practical ergonomic daily-access zone extends to approximately 60 inches.1
- A floating shelf bracket anchored to one wall stud holds approximately 50 lbs; drywall-only installation is limited to 15 to 25 lbs depending on anchor type.4
- Standard U.S. residential walls use studs spaced 16 inches on-center, giving reliable anchor points roughly every 16 inches along any load-bearing wall.3
- A 2025 study found open shelves at accessible heights reduced retrieval task time by 14.7% compared to closed storage, from an average of 12.52 minutes down to 10.68 minutes.5
- Shelves installed above a standard interior door header (typically above 80 inches from the floor) fall outside residential door-clearance requirements and work well for long-term storage.8
What to Assess Before Installing Floating Shelves for Small Spaces
Floating shelves fail most often not because of poor installation, but because of poor planning. Before measuring anything, you need four answers: what your wall is made of, whether you have a stud finder or know your stud layout, what the room currently stores, and how often you reach for each category of item. Those four answers govern every decision that follows.
Know Your Wall Type
Most residential interiors in the U.S. use drywall over wood studs, which is floating-shelf-friendly because studs give you anchor points every 16 inches.3 Plaster walls, concrete or masonry, and tiled surfaces each need different anchoring approaches and often require professional assessment before proceeding. For any wall type other than standard drywall over wood studs, consult a licensed contractor before committing to a shelf layout. The guidance in this article applies to standard drywall walls.
Gather the Right Tools
You need a stud finder, a spirit level, a tape measure, a pencil, and a drill with the correct bits for your bracket screws and anchor hardware. Check what anchors your brackets specify: most floating shelf kits state the screw diameter and length. The wall stud is always the preferred target. If a stud falls in the wrong spot for your preferred shelf width, decide early whether you shift the shelf slightly or use a heavier toggle anchor for the off-stud mounting point.
Step 1: Find the Right Shelf Height
Where a shelf sits on the wall determines who uses it and how often. The most common mistake in small spaces is installing shelves too high because the wall looks empty near the ceiling and cluttered near the floor. High shelves look tidy in photos, but they stop being used after the first week because retrieving items requires a step stool. The result: the shelf becomes decoration, not storage.
Ergonomic reach research divides wall height into four functional zones. Understanding each zone before you mount anything prevents the problem of shelves installed for aesthetics that fail as daily storage.
“The range for unobstructed reaches (15 to 48 inches) applies only to those portions of elements that are operable.”1
U.S. Access Board, federal accessibility standards agency
The Low Zone: 15 to 36 Inches
Shelves in this range sit below average waist height. Reaching them requires bending forward, which OSHA identifies as a posture that increases injury risk compared to working in the waist-to-shoulder zone.2 In a small space, low shelves work for items retrieved rarely: reference books, seasonal decorations, spare linens. Putting frequently used objects here creates daily friction. One exception: a shelf installed at exactly 30 to 36 inches functions well as a secondary work surface in a room where counter height is a constraint, provided the depth is sufficient (at least 14 inches).
The Daily Access Zone: 36 to 60 Inches
This is the primary shelf zone for any item you reach for every day. The ADA defines the unobstructed forward reach maximum at 48 inches, covering the lower portion of this band.1 For standing adults of average height, comfortable reach extends upward to roughly 60 inches without straining the shoulders or tilting the head back. Items in this zone are visible, accessible without effort, and easy to return. In a kitchen, cooking oils, spices, and frequently used dishware belong here. In a living room, remotes, books in active rotation, and chargers work well. In a home office, reference materials and daily supplies fit this height. Prioritize this zone for your highest-use storage before placing anything higher.
The Extended Reach Zone: 60 to 72 Inches
Most adults standing without assistance reach comfortably to 60 to 72 inches. Items stored here require a slight upward reach but no step stool. The zone works for things retrieved a few times per week: backup supplies, extra mugs, a second set of dishes. Avoid placing heavy objects in this zone because lifting weight overhead increases fatigue and drop risk on the return. Keep items here light.
The High Storage Zone: Above 72 Inches
Anything above 72 inches from the floor requires a step stool for most people. That makes it a long-term storage zone, not a daily one. Use it for items retrieved monthly or seasonally: holiday decorations, off-season textiles, spare hardware. One specific location where this zone makes excellent use of dead space: above an interior doorway. Residential code sets the minimum door height at 78 inches under IRC 2024 standards.8 A shelf mounted above the door header (typically 82 to 84 inches above the floor for standard interior doors) sits entirely outside the door’s movement path and above most people’s head-strike zone. Depth matters here: keep above-door shelves at 8 inches or shallower so items do not overhang into the doorway circulation area. For planning considerations on using full wall height systematically, the article on floor-to-ceiling shelf planning covers the full vertical zoning approach.
Step 2: Choose the Right Shelf Depth
Shelf depth is the variable that most often makes a small room feel smaller after installation. A shelf running 14 inches deep across a narrow hallway or above a bed cuts visual space and physically narrows the room. The goal is the shallowest depth that holds what you need, with nothing hanging over the edge.
No single building code specifies a required depth for residential floating shelves. The ranges below come from professional kitchen and bath standards, ergonomic reach limits, and commonly agreed installation practice.
| Room / Context | Recommended Depth | What It Holds Comfortably |
|---|---|---|
| Bathroom | 6 to 8 inches | Toiletries, rolled towels, small plant pots |
| Bedroom / Living Room | 8 to 10 inches | Books (standard paperback 5.5 in., hardcover 7 in.), small decor, candles |
| Home office | 8 to 10 inches | Binders, notebooks, small boxes, A5 or A4 books |
| Kitchen open shelves | 10 to 12 inches | Standard dinner plates (10.5 in. diameter), stacked bowls, mugs |
| Above-door / high zone | 6 to 8 inches | Lightweight boxes, folded textiles, seasonal items |
Bathroom Shelves: Keep Them Shallow
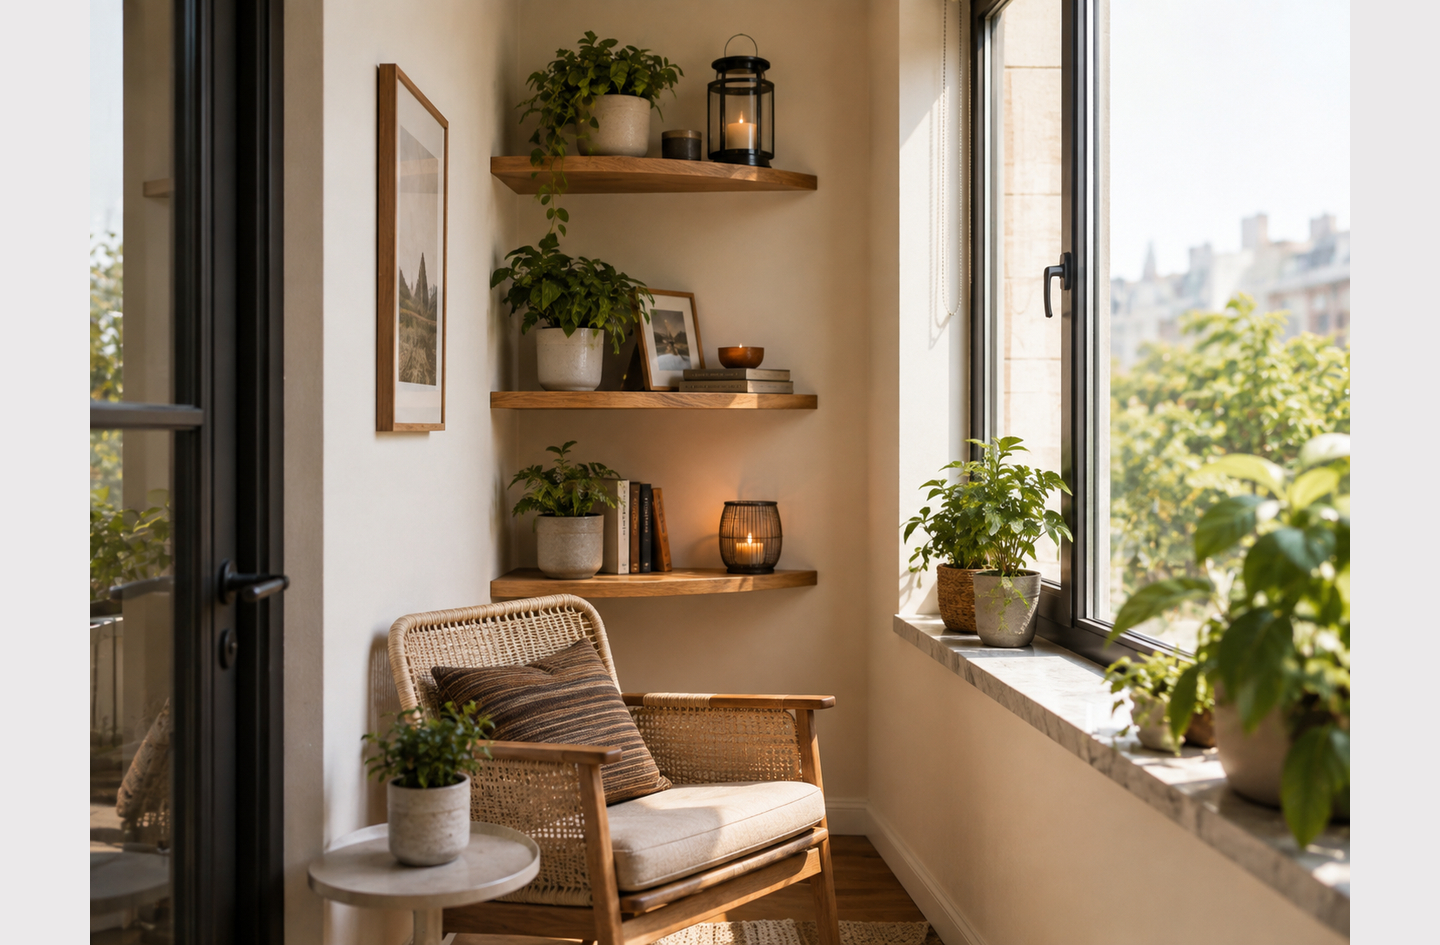
Bathrooms are the room where depth mismatches cause the most problems. A 12-inch shelf above a toilet or beside a sink juts into the circulation path and makes the room feel blocked. Six to 8 inches holds standard toiletry bottles, rolled hand towels, and a small plant. For reference: most pharmacy products stand 3 to 5 inches tall and 2 to 3 inches wide. Eight inches is more than sufficient. Going shallower (6 inches) keeps the shelf from projecting past the edge of a standard toilet tank (typically 7.5 to 8 inches wide). Shallow shelves also read as lighter on the wall, which matters in a small bathroom where every visual element either opens or compresses the space.
Living Room and Bedroom: The 8 to 10 Inch Sweet Spot
Standard paperback books measure 5.5 inches front to back. Hardcovers run 6 to 7.5 inches. A 10-inch shelf holds both formats comfortably with an inch to spare. Going to 12 inches adds visual weight without meaningful additional capacity for most bedroom and living room items. The 8 to 10 inch range also stays within the ADA’s depth guidance for projections: wall-mounted elements between 27 and 80 inches above the floor must not project more than 4 inches into the path of travel for accessibility compliance, though this applies to commercial spaces and is referenced here as a design discipline, not a residential code requirement. For corner shelving as an alternative approach, the article on corner shelf ideas for small spaces covers how triangular corner shelves use a different depth logic entirely.
Kitchen Open Shelving: Match the Plate
Standard dinner plates measure 10 to 10.5 inches in diameter. A 10-inch shelf holds one row of plates flush with the edge, which means the plate lip is at the edge with no safety margin. Twelve inches gives a more secure placement with room to retrieve without catching the rim. The NKBA’s kitchen planning standards specify a minimum 15-inch clearance above countertop surfaces for any overhead shelves or cabinets,7 a figure worth holding even on open shelves above a prep area. If your kitchen has a tile backsplash and you plan shelves above it, verify the substrate type before drilling: the hollow sound behind the tile indicates a gap between tile and wall that affects anchor choice.
Step 3: Space Your Shelves Vertically
Vertical spacing determines what each shelf holds. Get it wrong and you end up with shelves too close together to slide in a mug, or so far apart that the space above each shelf is mostly dead air. The rule is straightforward: measure the tallest item you plan to store on each shelf, then add 1 to 2 inches of clearance above it.
Standard Item Spacing: 12 to 15 Inches
For general-purpose shelves holding books, small containers, plant pots, and household items, 12 to 15 inches between shelf surfaces covers most objects. A standard mug stands 4.5 to 5 inches tall. A paperback sits 7 to 8 inches high. A 12-inch gap works for both, with room to fit your hand around the item to lift it out. Moving to 15 inches accommodates taller items like cereal boxes (9 to 11 inches), water bottles (11 inches), or small-format cookbooks (9 to 10 inches). If you run more than two shelves on a wall, consider alternating spacing: tighter near the bottom for smaller items, wider toward the top for taller ones. The rhythm reads as intentional and the function follows.
Tall Objects and Appliances: 15 to 20 Inches
If a shelf needs to hold a blender (14 to 16 inches tall), a French press (12 inches), or a row of wine bottles (11 to 12 inches on their side), spacing below 15 inches forces you to tilt the item to slide it in, which is a reset-friction problem. High reset friction means the item stops getting returned to its shelf within a few days. Plan 18 to 20 inches for any shelf that holds appliances or tall bottles. One exception applies to wall-mounted wine storage in kitchens: horizontal bottle racks reduce height requirements because bottles store on their side (about 3.5 to 4 inches in diameter). For compact kitchen wine storage specifically, wall-mounted wood wine racks use a different vertical logic entirely and are covered in a separate spoke on wall-mounted wine storage for small kitchens. At the other end of the spectrum, high storage zones that hold seasonal boxes often benefit from generous spacing (20 to 24 inches) so items fit without requiring two hands to tilt and slide.
Step 4: Anchor Into Something That Holds
A floating shelf looks wall-mounted but it is bracket-mounted. The bracket carries the load, and the bracket is only as strong as what it screws into. Weight capacity is the least intuitive part of floating shelf planning for most people because the numbers change dramatically depending on what is behind the drywall.
Studs vs. Drywall: What Each Carries
When a floating shelf bracket anchors into a wood stud, each stud connection supports approximately 50 lbs, according to bracket manufacturer testing.4 A shelf spanning two studs (32 inches wide, since studs sit 16 inches on-center in standard load-bearing walls3) can carry roughly 100 lbs distributed across both brackets. Drywall alone without a stud is a different situation. Standard drywall anchors (the plastic ribbed type) hold 10 to 15 lbs each in horizontal pull. Toggle bolts hold more, typically 20 to 40 lbs each in horizontal load depending on bolt size. In practice, a shelf anchored only into drywall with no stud should stay below 15 to 25 lbs total to remain within safe working load for most anchor types.4 Note that these figures reflect bracket manufacturer specifications and typical installation practice, not independently certified structural data. For shelves carrying heavy loads (dense book collections, cast iron cookware, multiple appliances), consult a licensed contractor or structural engineer before installation. The American Wood Council’s NDS standards and connection calculators are the authoritative engineering references for wood-screw load calculations. Square footage is fixed, but your anchor strategy is a choice you make once and live with every day after.
Locating studs before marking shelf positions is essential. A standard electronic stud finder identifies the stud edges with a sensor sweep. Mark both edges of each stud and drill into the center. When a shelf’s preferred width lands between studs, the options are: shift the shelf position slightly to hit two studs, use a mounting rail that spans two studs and supports the full shelf length, or accept lower weight capacity with heavy-duty toggle anchors. Never mount a shelf intended for significant weight on drywall alone without verifying the anchor ratings against what you plan to store.
Renter-Friendly Anchoring
Renters in small apartments face a specific constraint: leases typically restrict drilling or specify patching requirements on move-out. Two approaches work without structural modification. The first is tension-mounted shelving, where vertical poles press between floor and ceiling without drilling. The shelves attach to the poles and hold reasonable loads (20 to 40 lbs per shelf, depending on the system). The second is adhesive rail mounting, where heavy-duty adhesive strips anchor a horizontal rail to the wall and lightweight shelves clip onto the rail. Adhesive systems have weight limits typically between 10 and 20 lbs per rail section. Both options work for bathroom toiletries, kitchen spice storage, and light display items. Neither replaces a stud-mounted shelf for books, cast iron cookware, or kitchen dishware. For renter-friendly alternatives to drilling across the entire home, the guide on tall narrow shelving for small spaces covers freestanding vertical storage units that need no wall anchor at all.
Step 5: Assign Items to Each Zone
Most shelf plans fail not at installation but at population. People fill shelves from bottom to top with whatever comes to hand first, which leaves frequently used items buried and infrequently used items at eye level. The better approach is to assign each zone before you move a single object onto the wall.
A 2025 study found open shelves at accessible heights reduced task completion time by 14.7% compared to closed storage in the same kitchen environment, from 12.52 minutes average to 10.68 minutes, with step count reductions reaching statistical significance at p=0.002.5 The researchers attributed the improvement to greater navigational efficiency when items were visually accessible at reachable heights. Visible storage at the right position reduces the mental and physical effort of retrieval.
Daily-Access Items: The 36 to 60 Inch Zone
Everything you reach for every day goes here. In a kitchen: oils, salt, pepper, spices, a coffee canister, the mugs you use each morning. In a living room: the remote, a book in progress, charging cables, a small plant you water regularly. In a bedroom: a daily moisturizer, reading glasses, the alarm clock or a small speaker. This zone is the most valuable real estate on your wall. Do not fill it with decorative objects that serve no functional role unless the room already has enough daily-use storage elsewhere. Decorate last, after the functional assignment is complete. The density of items in this zone also matters. A shelf packed edge-to-edge is harder to use than one with modest breathing room between objects. Leave a small gap on each side of each item so retrieval does not disturb its neighbors.
Occasional and Seasonal Items: The Extended and High Zones
Items you reach for weekly go in the extended zone (60 to 72 inches). A spare set of mugs, a second canister of coffee, the router and modem if they live on a shelf, backup toiletries. Items retrieved monthly or seasonally go above 72 inches: holiday decorations, extra bed linens, an overflow pantry area for large bulk purchases. A key assignment rule for high storage is containment. Loose items above eye level are invisible, which means they get forgotten. Store high-zone items in labeled bins, baskets, or boxes so you retrieve the container, not individual objects. The bin comes down, you retrieve the item, the bin goes back. That reset is sustainable. Reaching up to sort through loose objects one at a time is not.
Decorative Items: Fill the Gaps, Not the Shelves
Floating shelves in a small room look best when most of the surface holds functional items and a smaller portion holds visual anchors: a plant, a framed photo, a candle. The visual anchors prevent the shelf from reading as a utilitarian storage row. The mistake is reversing this: filling a shelf with purely decorative items gives you a display case, not storage. In small rooms where every inch needs a job, a shelf with only decorative function is expensive square footage. Integrate one or two decorative objects per shelf alongside functional storage rather than dedicating entire shelves to display alone.
Common Planning Mistakes
Installing Too Many Shelves on One Wall
A wall covered edge-to-edge with shelves reads as storage infrastructure, not a room. In a small space, visual density amplifies the sense of confinement. The practical ceiling for most compact-room walls is three to four shelves before the room starts feeling like a warehouse shelf. The better approach: plan two or three shelves at the right heights and leave the rest of the wall breathing room. If your storage needs genuinely exceed what three well-placed shelves hold, a freestanding unit or closed cabinet solves the capacity problem without covering the wall.
Mounting Before Testing Load
Brackets look structurally sound on the wall before any weight goes on them. The failure mode happens after loading. Load a new shelf to its intended capacity, then stand beside it and push down gently on the outer edge. If the brackets flex more than a few millimeters or the wall surface moves, the anchor is insufficient. Doing this test immediately after installation, before the shelf is fully populated, identifies weak anchors before they fail under weeks of cumulative load. A bracket that holds 30 lbs at installation may pull free after the repeated stress of loading, unloading, and vibration.
Choosing Depth for the Largest Item Rather Than the Typical Item
One oversized item forces a depth the rest of the shelf does not need. On a narrow bedroom wall, an unnecessarily deep shelf reduces the walking path to the bed. The better approach: store the outlier elsewhere, and choose the depth based on what most items actually require. Deep shelves are not more functional when most of what you store is under 8 inches front to back. They are heavier to look at, harder to clean, and more likely to accumulate clutter at the back where things fall out of sight.
Skipping Level Verification Across Multiple Shelves
Three shelves at slightly different angles look like a mistake. On a wall with stacked shelves, a spirit level at every installation is mandatory. Inexpensive laser levels project a horizontal line across the full wall and eliminate cumulative error. Never use the first shelf as a visual reference for the second.
Frequently Asked Questions
How high should floating shelves be in a small bedroom?
Install daily-use items between 36 and 60 inches from the floor, which sits within the ADA’s unobstructed forward reach range of 15 to 48 inches and extends slightly higher to the standing adult’s comfortable reach zone.1 For bedside shelves positioned above a mattress, 28 to 32 inches from the floor puts the shelf within arm’s reach while seated or lying down, depending on mattress height. Avoid anything above 72 inches for items you reach for every day.
What is the maximum weight floating shelves can hold?
A shelf anchored into two wall studs holds approximately 100 lbs based on bracket manufacturer specifications of roughly 50 lbs per stud connection.4 Drywall-only installation (no stud) is limited to 15 to 25 lbs depending on anchor type. For heavier loads, such as a full collection of dense hardcover books, consult a licensed contractor to verify the wall assembly and choose appropriate hardware.
How far apart should floating shelves be vertically?
Space shelves 12 to 15 inches apart for most household items, including books, mugs, and small containers. Increase to 18 to 20 inches for shelves holding tall appliances, wine bottles, or items over 10 inches in height. Measure the tallest item you plan to store, then add 1 to 2 inches for clearance when retrieving. Tight spacing forces tilting and dragging items, which increases daily friction and leads to shelves being abandoned.
What depth should floating shelves be in a small bathroom?
Six to 8 inches is the practical depth for bathroom floating shelves. This holds standard toiletry bottles (typically 2 to 3 inches wide), rolled towels, and small plant pots without projecting far enough to narrow the circulation path. Shelves above 10 inches in a standard bathroom encroach on the sink or toilet zone and create head-strike risk for anyone leaning forward. Shallower also reads as lighter and less intrusive on a small bathroom wall.
How do renters add floating shelves without damaging walls?
Two renter-safe alternatives work without drilling. Tension-mounted pole shelving presses between floor and ceiling and holds 20 to 40 lbs per shelf depending on the system. Adhesive rail systems mount with heavy-duty strips and hold 10 to 20 lbs per section, suitable for light bathroom or kitchen storage. Both require smooth, clean wall surfaces. Neither replaces stud-mounted shelving for heavy loads. Verify your lease terms before any installation, including adhesive systems, since some leases restrict adhesive damage as well.
Limitations and Edge Cases
- The weight capacity figures in this article reflect bracket manufacturer specifications, not independently certified structural engineering data. For shelves carrying dense books, cast iron cookware, or other heavy loads, have a licensed contractor verify the wall assembly and anchor selection for your specific home.
- Stud spacing, wall construction, and door height minimums differ outside the U.S. Readers in other countries should consult their national building standards rather than the IRC and IBC figures referenced here.
- The ergonomic reach zones are based on ADA standards designed for accessibility and OSHA guidance for standing workers. Reach ranges for seated users, children, or individuals with mobility differences fall outside what this article addresses.
References
- U.S. Access Board – ADA Guide Chapter 3: Operable Parts, forward reach range 15 to 48 inches, 2024.
- OSHA, U.S. Department of Labor – Guidelines for Retail Grocery Stores, OSHA 3192, ergonomic shelf height guidance, 2004 (active).
- International Code Council – 2024 International Residential Code (IRC), Chapter 6 Wall Construction, Section R602.3 stud spacing, 2024.
- Ultrashelf – How Much Weight Can a Floating Shelf Hold? Bracket manufacturer weight capacity specifications, 2024.
- PubMed Central – Bilau et al., Visual Accessibility through Open Shelving: Impacts on Cognitive Load, Motivation, Physical Activity, and User Perception in Older Adults with Mild Cognitive Impairment, Georgia Tech and Emory University, May 2025.
- National Apartment Association – Average Apartment Sizes Increasing, citing RentCafe data: average U.S. studio apartment 457 sq ft in 2024, May 5, 2025.
- WC Supply – NKBA Kitchen Design Guidelines and Standard Clearances, minimum 15-inch countertop clearance above overhead elements, 2024.
- International Code Council – 2024 International Building Code (IBC), Section 1010.1.1, minimum door clear opening height 80 inches, 2024.
Conclusion
Getting floating shelves right in a small room is a sequencing problem. Height first, depth second, spacing third, anchoring fourth, assignment last. Move through those decisions in order and the shelves become genuinely usable storage rather than another surface for things to pile up on. The daily access zone between 36 and 60 inches is where the most valuable storage lives. Everything else supports it.
For the full framework on combining shelves with other vertical storage methods across a small home, see the vertical storage overview at Small Space Logic.